
| 일 | 월 | 화 | 수 | 목 | 금 | 토 |
|---|---|---|---|---|---|---|
| 1 | 2 | 3 | 4 | |||
| 5 | 6 | 7 | 8 | 9 | 10 | 11 |
| 12 | 13 | 14 | 15 | 16 | 17 | 18 |
| 19 | 20 | 21 | 22 | 23 | 24 | 25 |
| 26 | 27 | 28 | 29 | 30 | 31 |
- qunit
- PYTHON
- build
- xcode
- 센토스
- jest
- 맥
- 개발
- MAC
- VirtualBox
- Chrome
- IOS
- avds
- localserver
- vsCode
- unittest
- MachineLearning
- androidstudio
- ReactNative
- 리눅스
- Android
- TensorFlow
- picker
- 네트워크
- linux
- webpack
- react
- node
- centos
- Today
- Total
목록App & OS/Hybrid (28)
로메오의 블로그
 [React Native] Codepush 배포하기 [Appcenter deployment]
App.js에 다음코드를 추가합니다. import React, { Component } from 'react'; import {StyleSheet, View, Text} from 'react-native'; import codePush from 'react-native-code-push'; class App extends Component { render() { return ( Hello World!! Version 1.0 ); } } const styles = StyleSheet.create({ container: { flex: 1, justifyContent: 'center', alignItems: 'center', backgroundColor: '#F5FCFF', }, }); const codePu..
 [React Native] Codepush deployment key 설정 [Appcenter]
iOS Deployment key 설정 https://appcenter.ms/apps Appcenter에서 iOS 프로젝트를 선택합니다. Distribute를 선택합니다. Distribute > CodePush를 선택합니다. Create standard depolyments를 누릅니다. 렌치 아이콘을 누릅니다. Production deployment key를 복사합니다. xCode에서 Info.plist 파일에 CodePushDeploymentKey값을 추가하고 붙여넣기 합니다. Android Deployment key 설정 메인에서 Android 프로젝트를 선택하고 위와 같이 deployment key를 복사합니다. Android Studio에서 MainApplication.java에 deploymen..
 [React Native] Codepush module 설치 [Appcenter]
codepush 영문 메뉴얼 https://docs.microsoft.com/en-us/appcenter/distribution/codepush/react-native react-native-code-push module 설치 $ npm install --save react-native-code-push iOS 설정 pod 설치 $ cd ios $ pod init /my/project/path/firstProject/ios/Podfile 을 엽니다. target 'firstProject' do # React Native requirements pod 'React', :path => '../node_modules/react-native', :subspecs => [ 'Core', 'CxxBridge', #..
 [React Native] Codepush 설치하기 [Appcenter]
Appcenter란? react native나 cordova 같은 hybrid 앱을 재설치 없이 원격으로 업데이트 할 수 있습니다. Appcenter 가입 https://appcenter.ms/ microsoft appcenter 가입합니다. appcenter-cli 설치 $ npm install -g appcenter-cli appcenter 로그인 $ appcenter login 브라우저가 열리면 Authentication 코드를 복사합니다. Access code를 붙여넣기 합니다. App project 생성하기 $ appcenter apps create -d FirstProject -o Android -p React-Native $ appcenter apps create -d FirstProject..
 [React Native] Jest - props 테스트 [Enzyme]
props가 적용된 화면 개발하기 App.js import React, { Component } from 'react'; import { StyleSheet, View, } from 'react-native'; import Props from './src/Props' export default class App extends Component { render() { return ( ); } } const styles = StyleSheet.create({ container: { flex: 1, justifyContent: 'center', alignItems: 'center', backgroundColor: '#F5FCFF', }, }); src/Props.js import React, { Compone..
 [React Native] Jest - Api 테스트 [Jest Mock Api 사용하기]
서버에서 받을 데이터를 Mock 데이터로 테스트 해보겠습니다. 데이터는 Facebook의 react-native 레퍼지토리에 있는 json 파일을 이용해 보겠습니다. 주소는 http://facebook.github.io/react-native/movies.json { "title": "The Basics - Networking", "description": "Your app fetched this from a remote endpoint!", "movies": [ { "id": "1", "title": "Star Wars", "releaseYear": "1977" }, { "id": "2", "title": "Back to the Future", "releaseYear": "1985" }, { "id":..
 [React Native] Jest - Element 정의 테스트
화면에 Element가 있는지 없는지를 테스트 합니다. 화면 코딩 /src/Element.js import React, { Component } from 'react'; import { View, TextInput, } from 'react-native'; export default class Element extends Component { render() { return ( ); } } Test Code 작성하기 /__test__/Function-test.js import 'react-native'; import React from 'react'; import Element from '../src/Element'; import renderer from 'react-test-renderer'; // e..
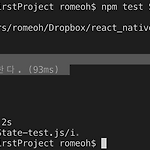 [React Native] Jest - state 테스트
화면 코딩 /src/State.js import React, { Component } from 'react'; import { View, } from 'react-native'; export default class State extends Component { constructor() { super() this.state = { data: 0 } } // test 할 함수 multiple(x) { // state를 변경한다. this.setState({ data: x * 2 }) } render() { return ( ); } } Test Code 작성하기 /__test__/State-test.js import 'react-native'; import React from 'react'; import S..