반응형
Notice
Recent Posts
Recent Comments
Link
| 일 | 월 | 화 | 수 | 목 | 금 | 토 |
|---|---|---|---|---|---|---|
| 1 | 2 | 3 | 4 | 5 | 6 | 7 |
| 8 | 9 | 10 | 11 | 12 | 13 | 14 |
| 15 | 16 | 17 | 18 | 19 | 20 | 21 |
| 22 | 23 | 24 | 25 | 26 | 27 | 28 |
Tags
- MAC
- MachineLearning
- 리눅스
- xcode
- 개발
- 센토스
- 맥
- VirtualBox
- pydantic
- 네트워크
- react
- linux
- 오블완
- Android
- centos
- Chrome
- unittest
- 티스토리챌린지
- IOS
- build
- vsCode
- localserver
- androidstudio
- PYTHON
- ReactNative
- TensorFlow
- webpack
- node
- fastapi
Archives
- Today
- Total
로메오의 블로그
[IONIC] Modal Controller - 파라미터 전달 본문
반응형
ionic-tutorial 프로젝트에서 계속합니다.
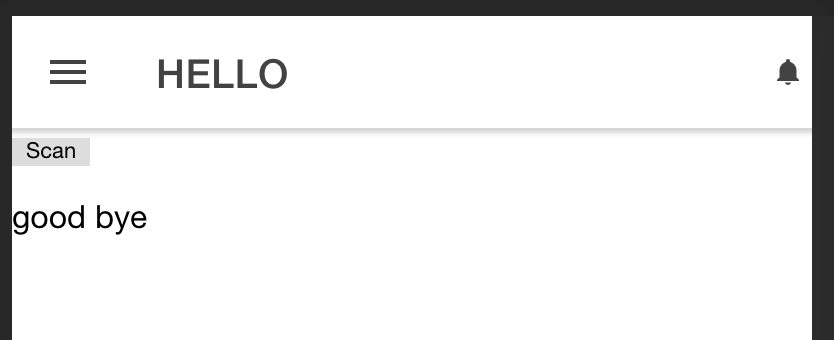
order 페이지에서 QRScanner를 띄우기 위해 먼저 modal 창을 띄우겠습니다.
order 페이지에서 qr-scan 모달을 띄우면서 parameter을 상호 전달합니다.
$ ionic g page qr-scansrc/app/account/order.module.ts
...
import { QrScanPage } from '../../qr-scan/qr-scan.page';

@NgModule({
  imports: [
    ....
  ],
  declarations: [OrderPage, QrScanPage],
  entryComponents: [QrScanPage]
})
....
import { NgModule } from '@angular/core';
import { CommonModule } from '@angular/common';
import { FormsModule } from '@angular/forms';

import { IonicModule } from '@ionic/angular';

import { OrderPageRoutingModule } from './order-routing.module';

import { OrderPage } from './order.page';
import { ComponentModule } from '../../components.module'
import { QrScanPage } from '../../qr-scan/qr-scan.page';

@NgModule({
  imports: [
    CommonModule,
    FormsModule,
    IonicModule,
    OrderPageRoutingModule,
    ComponentModule
  ],
  declarations: [OrderPage, QrScanPage],
  entryComponents: [QrScanPage]
})
export class OrderPageModule {}
src/app/account/order.page.html
<app-header></app-header>

<ion-content>
    <button (click)="opeQRScan()">Scan</button>
    <p *ngIf="dataReturned">{{ dataReturned.paramFromModal }}</p>
</ion-content>
src/app/account/order.page.ts
import { Component } from '@angular/core';
import { ModalController } from '@ionic/angular';
import { QrScanPage } from '../../qr-scan/qr-scan.page';

@Component({
  selector: 'app-order',
  templateUrl: './order.page.html',
  styleUrls: ['./order.page.scss'],
})
export class OrderPage {

  dataReturned

  constructor(
    public modalController: ModalController
  ) { }

  async opeQRScan() {
    const modal = await this.modalController.create({
      component: QrScanPage,
      componentProps: {
        param1: 'hello world'
      },
      animated: true,
    });
    modal.onDidDismiss().then((dataReturned) => {
      console.log(dataReturned)
      if (dataReturned !== null) {
        this.dataReturned = dataReturned.data;
      }
    });
    return await modal.present();
  }

}
src/app/qr-scan.page.html
<ion-header>
  <ion-toolbar>
    <ion-title>qr-scan</ion-title>
    <ion-buttons slot="end">
      <button ion-button icon-only color='black' (click)="closeModal()">
        <ion-icon name="close"></ion-icon>
      </button>
    </ion-buttons>
  </ion-toolbar>
</ion-header>

<ion-content>

</ion-content>
src/app/qr-scan.page.ts
import { Component, OnInit } from '@angular/core';
import { ModalController, NavParams } from '@ionic/angular';

@Component({
  selector: 'app-qr-scan',
  templateUrl: './qr-scan.page.html',
  styleUrls: ['./qr-scan.page.scss'],
})
export class QrScanPage implements OnInit {

  constructor(
    private navParams: NavParams,
    private modalController: ModalController
  ) {
    console.log(navParams.get('param1'));
  }

  ngOnInit() {
  }

  closeModal() {
    this.modalController.dismiss({
      paramFromModal: 'good bye'
    });
  }
}


반응형
'Frontend > angular' 카테고리의 다른 글
| [IONIC] iOS Status Bar font 색상 변경하기 (0) | 2020.01.16 |
|---|---|
| [Ionic] QR Code 생성하기 / QR Code Scan (1) | 2020.01.16 |
| [Angular] Angular Material 사용하기 (0) | 2020.01.15 |
| [Angular] ngx-translate 다국어 처리 (0) | 2020.01.14 |
| [Angular] Popover 구현하기 (0) | 2020.01.13 |
Comments


