| 일 | 월 | 화 | 수 | 목 | 금 | 토 |
|---|---|---|---|---|---|---|
| 1 | 2 | 3 | ||||
| 4 | 5 | 6 | 7 | 8 | 9 | 10 |
| 11 | 12 | 13 | 14 | 15 | 16 | 17 |
| 18 | 19 | 20 | 21 | 22 | 23 | 24 |
| 25 | 26 | 27 | 28 | 29 | 30 | 31 |
- 센토스
- pydantic
- ReactNative
- unittest
- MachineLearning
- 리눅스
- linux
- vsCode
- centos
- IOS
- 티스토리챌린지
- MAC
- androidstudio
- xcode
- Android
- Chrome
- localserver
- webpack
- 오블완
- fastapi
- 개발
- node
- VirtualBox
- TensorFlow
- 맥
- 네트워크
- build
- PYTHON
- react
- Today
- Total
로메오의 블로그
[Spring Boot] Rest Web Service 구축 - 배포하기 본문
Spring Boot / Oracle / Mybatis 차례
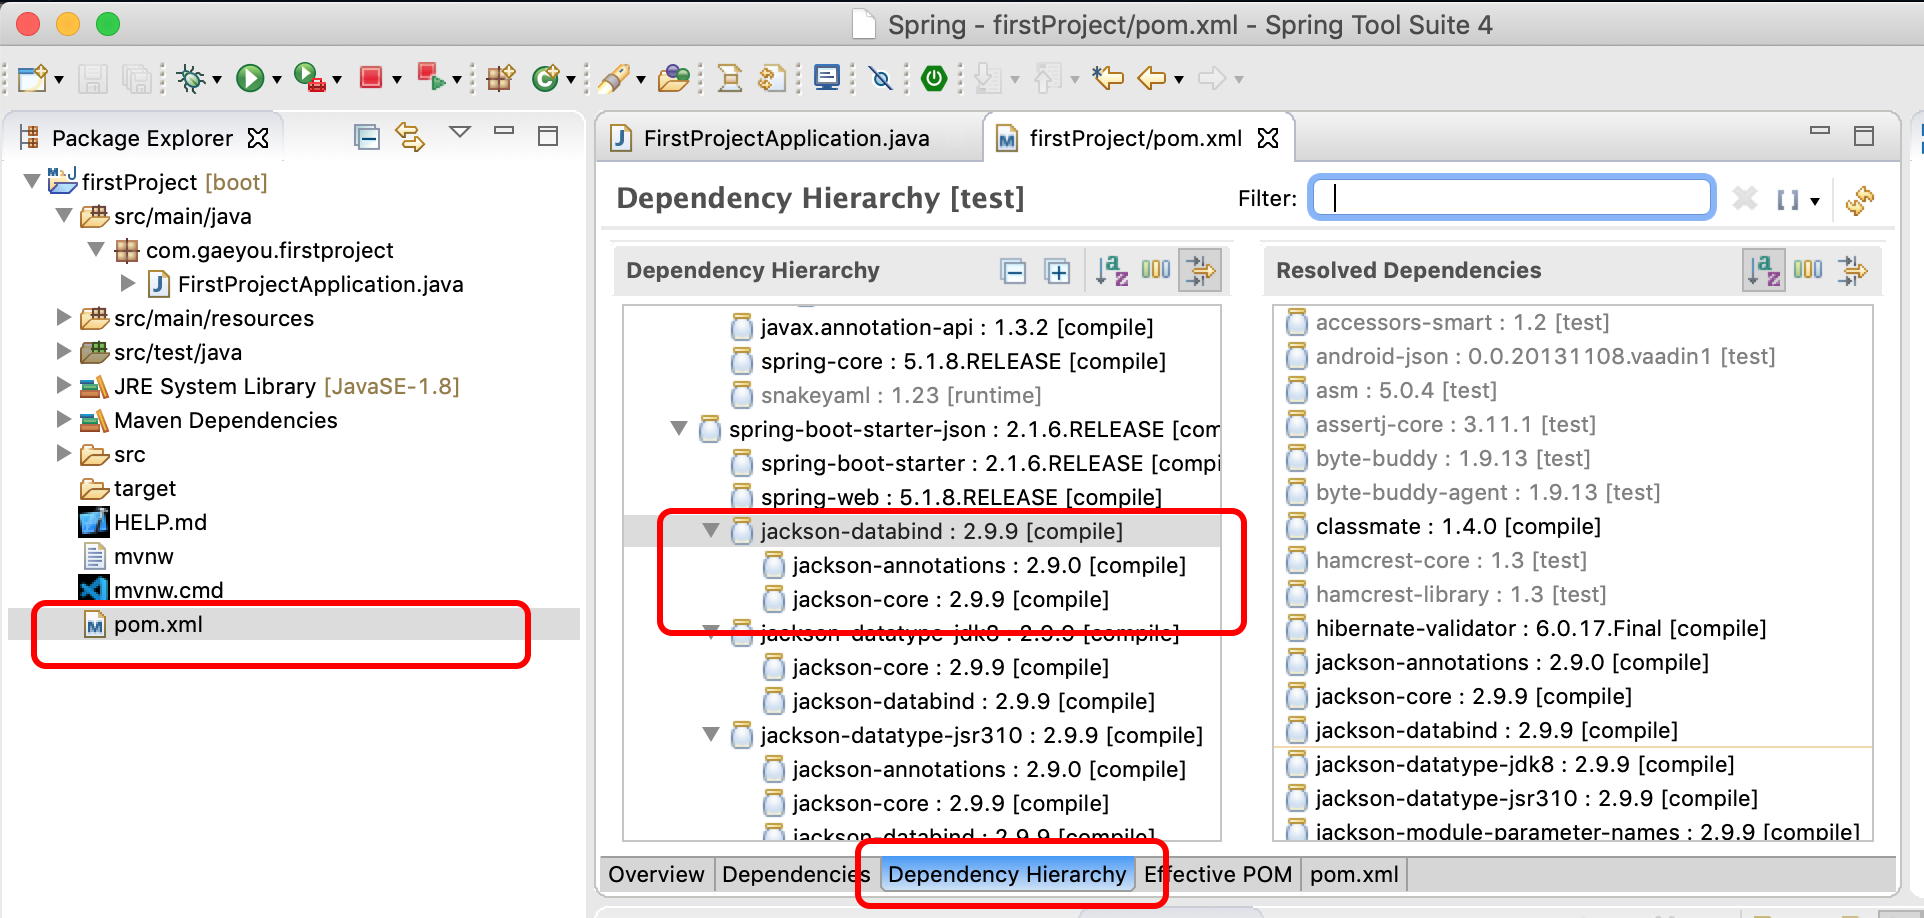
pom.xml을 열어서 Dependency Hierarchy에서 jackson-databind 모듈을 확인합니다.
json으로 출력해주는 라이브러리 입니다.
Model 추가하기
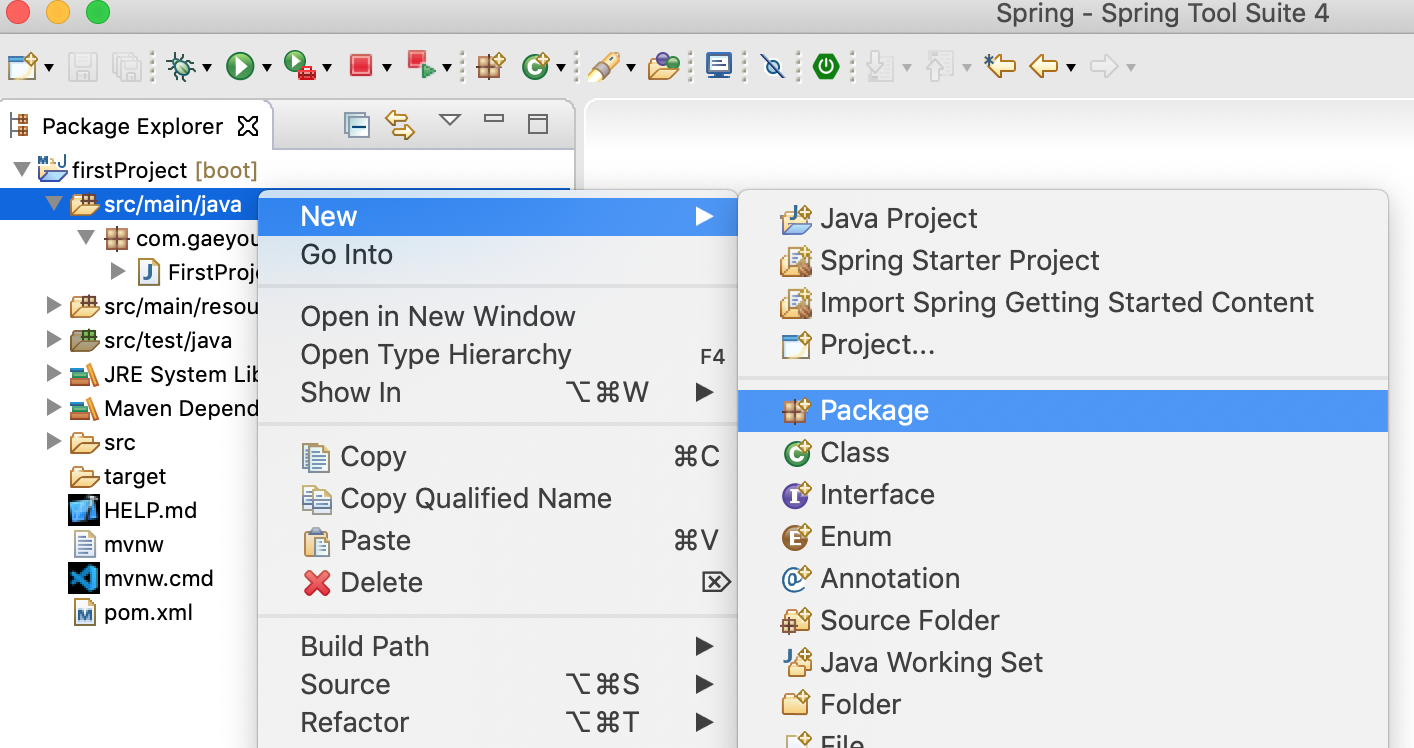
src/main/java 에서 New > Package를 선택합니다.

model을 추가합니다.
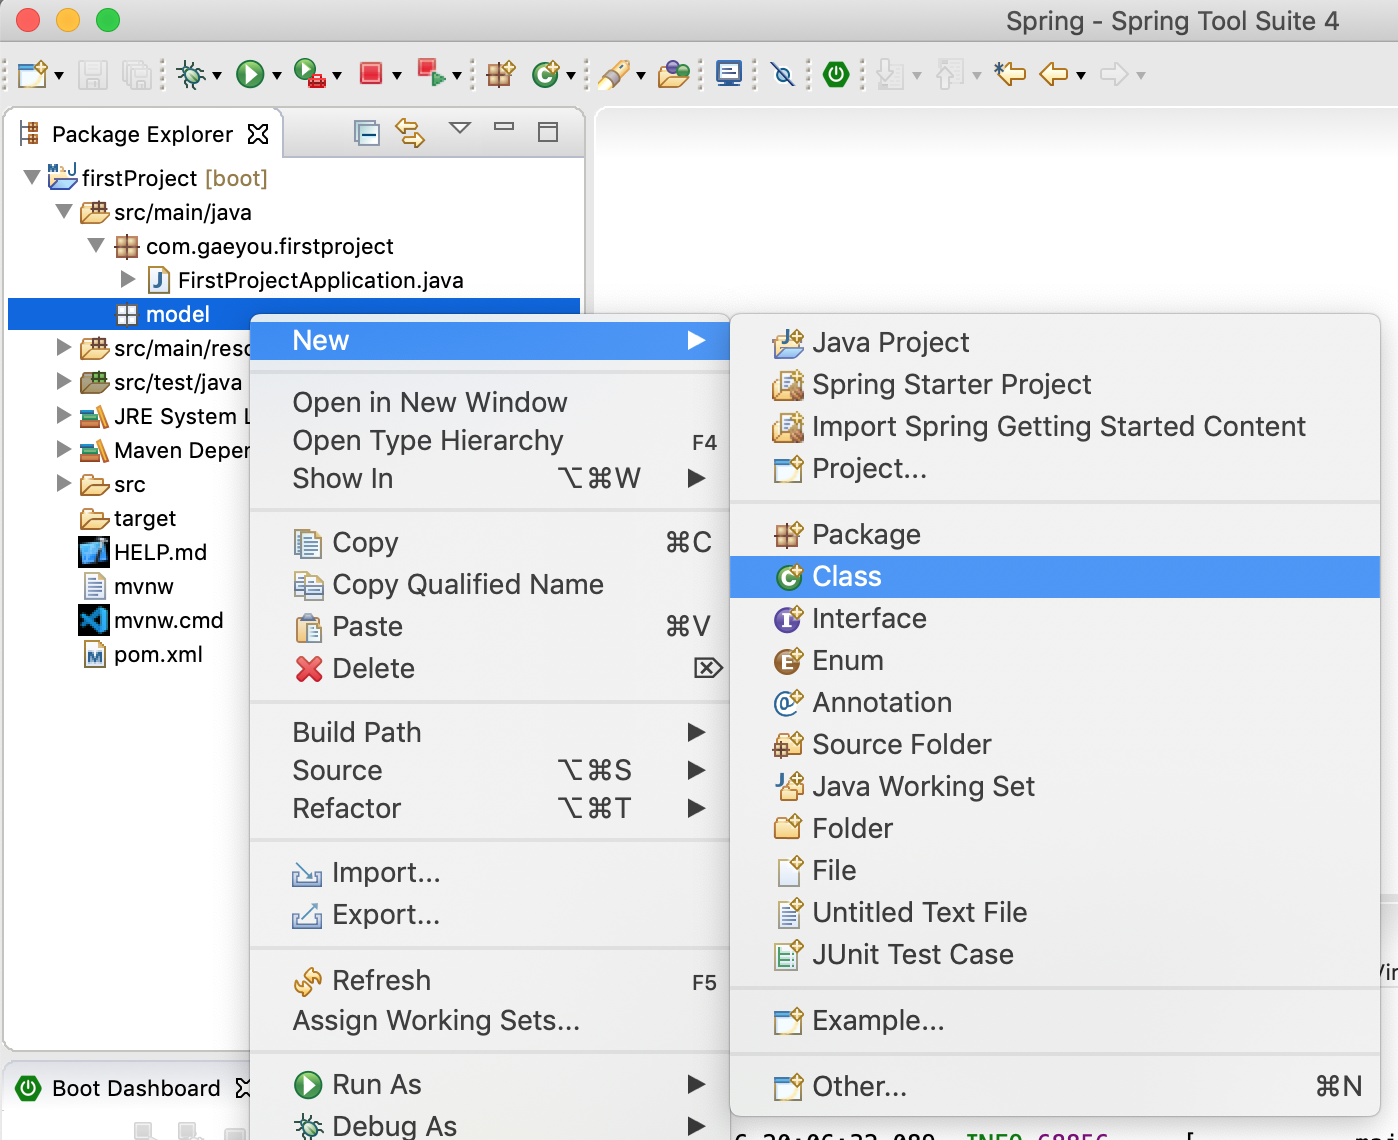
추가된 model에서 New > class를 선택합니다.
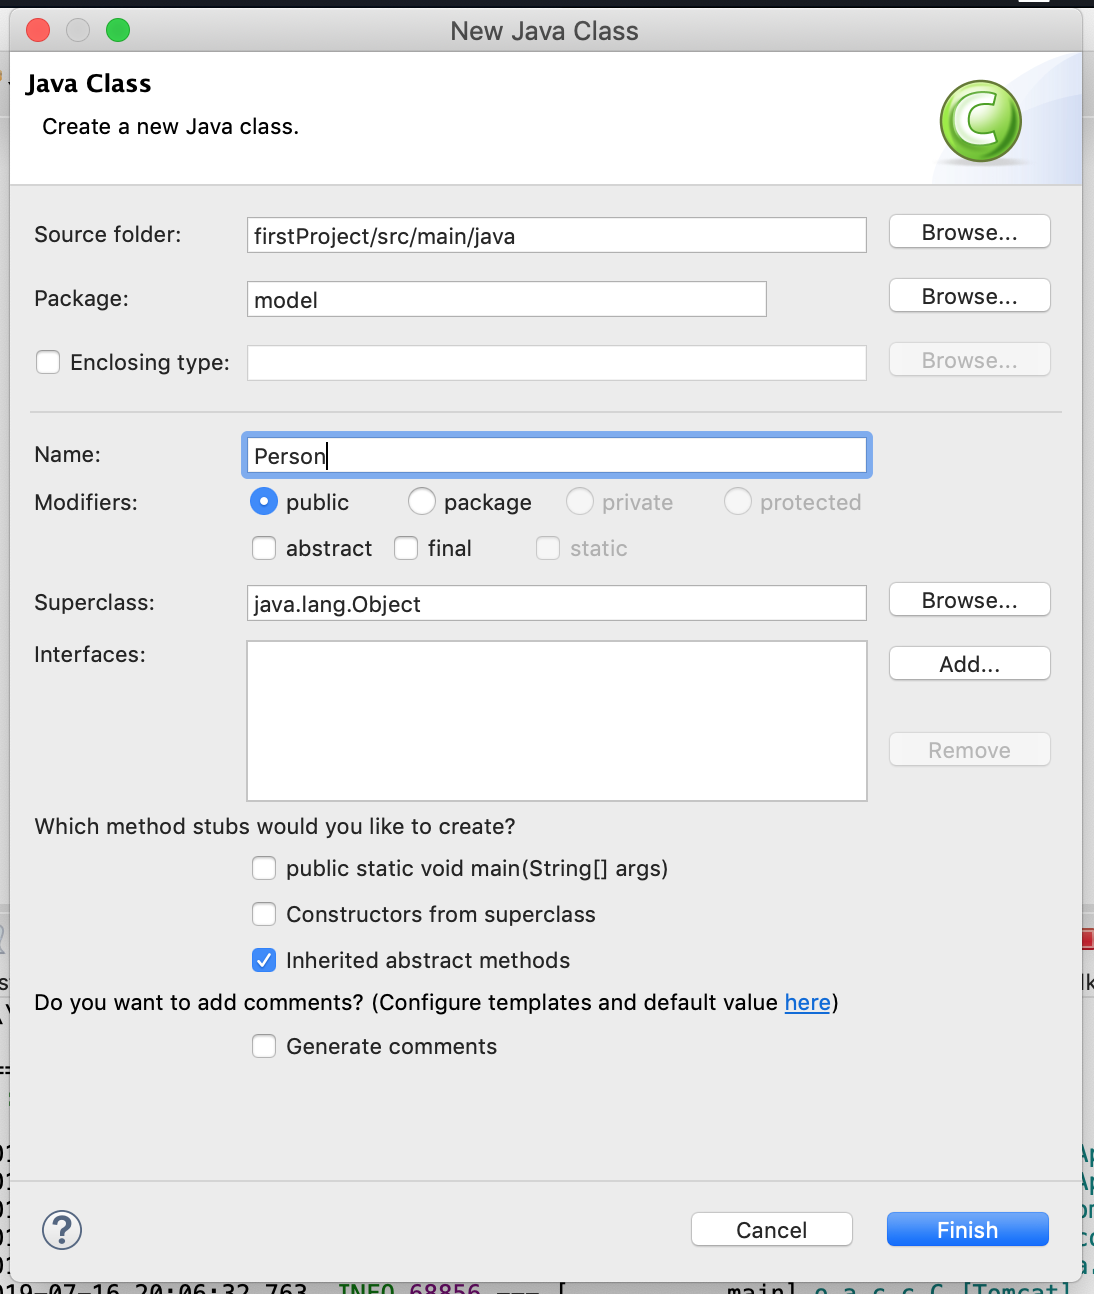
Person 클래스를 추가합니다.
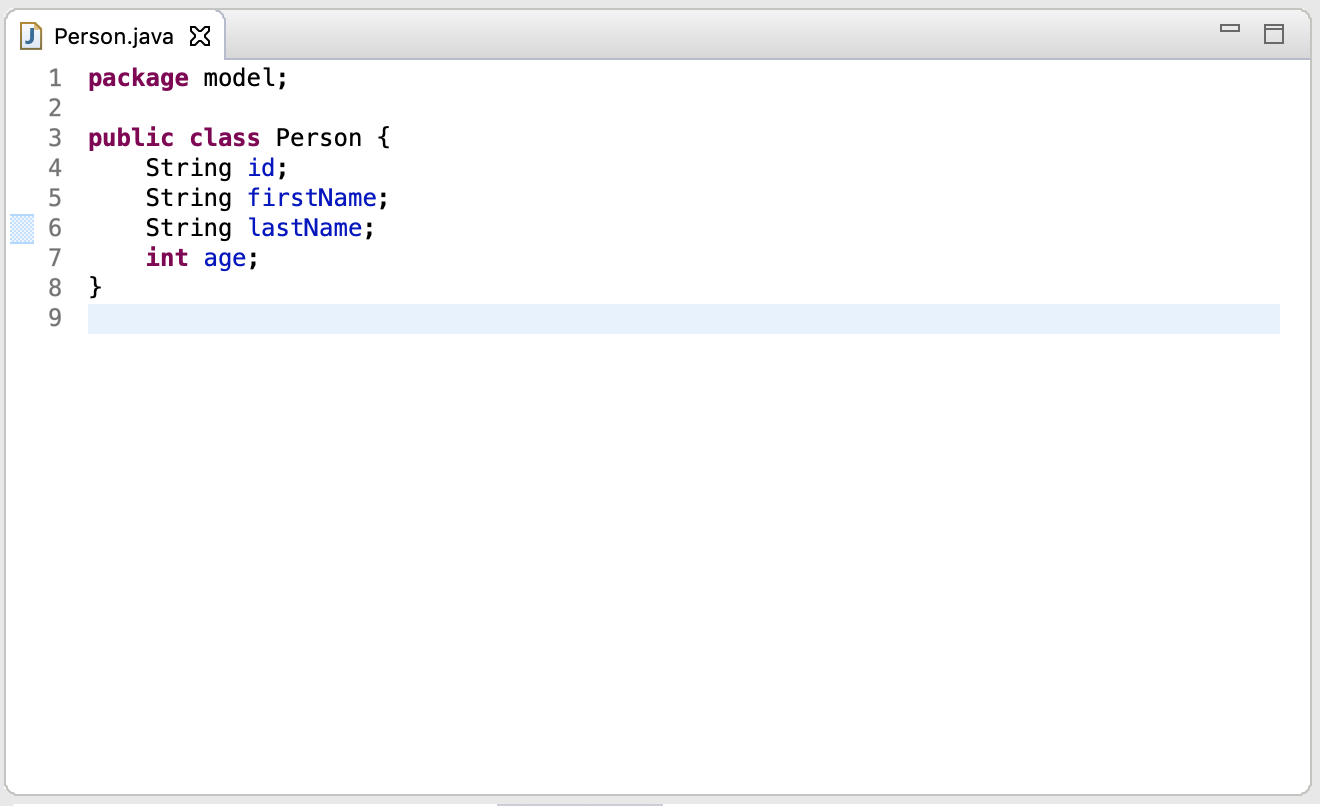
package model;

public class Person {
	String id;
	String firstName;
	String lastName;
	int age;
}
Person.java 파일에 코드를 추가합니다.
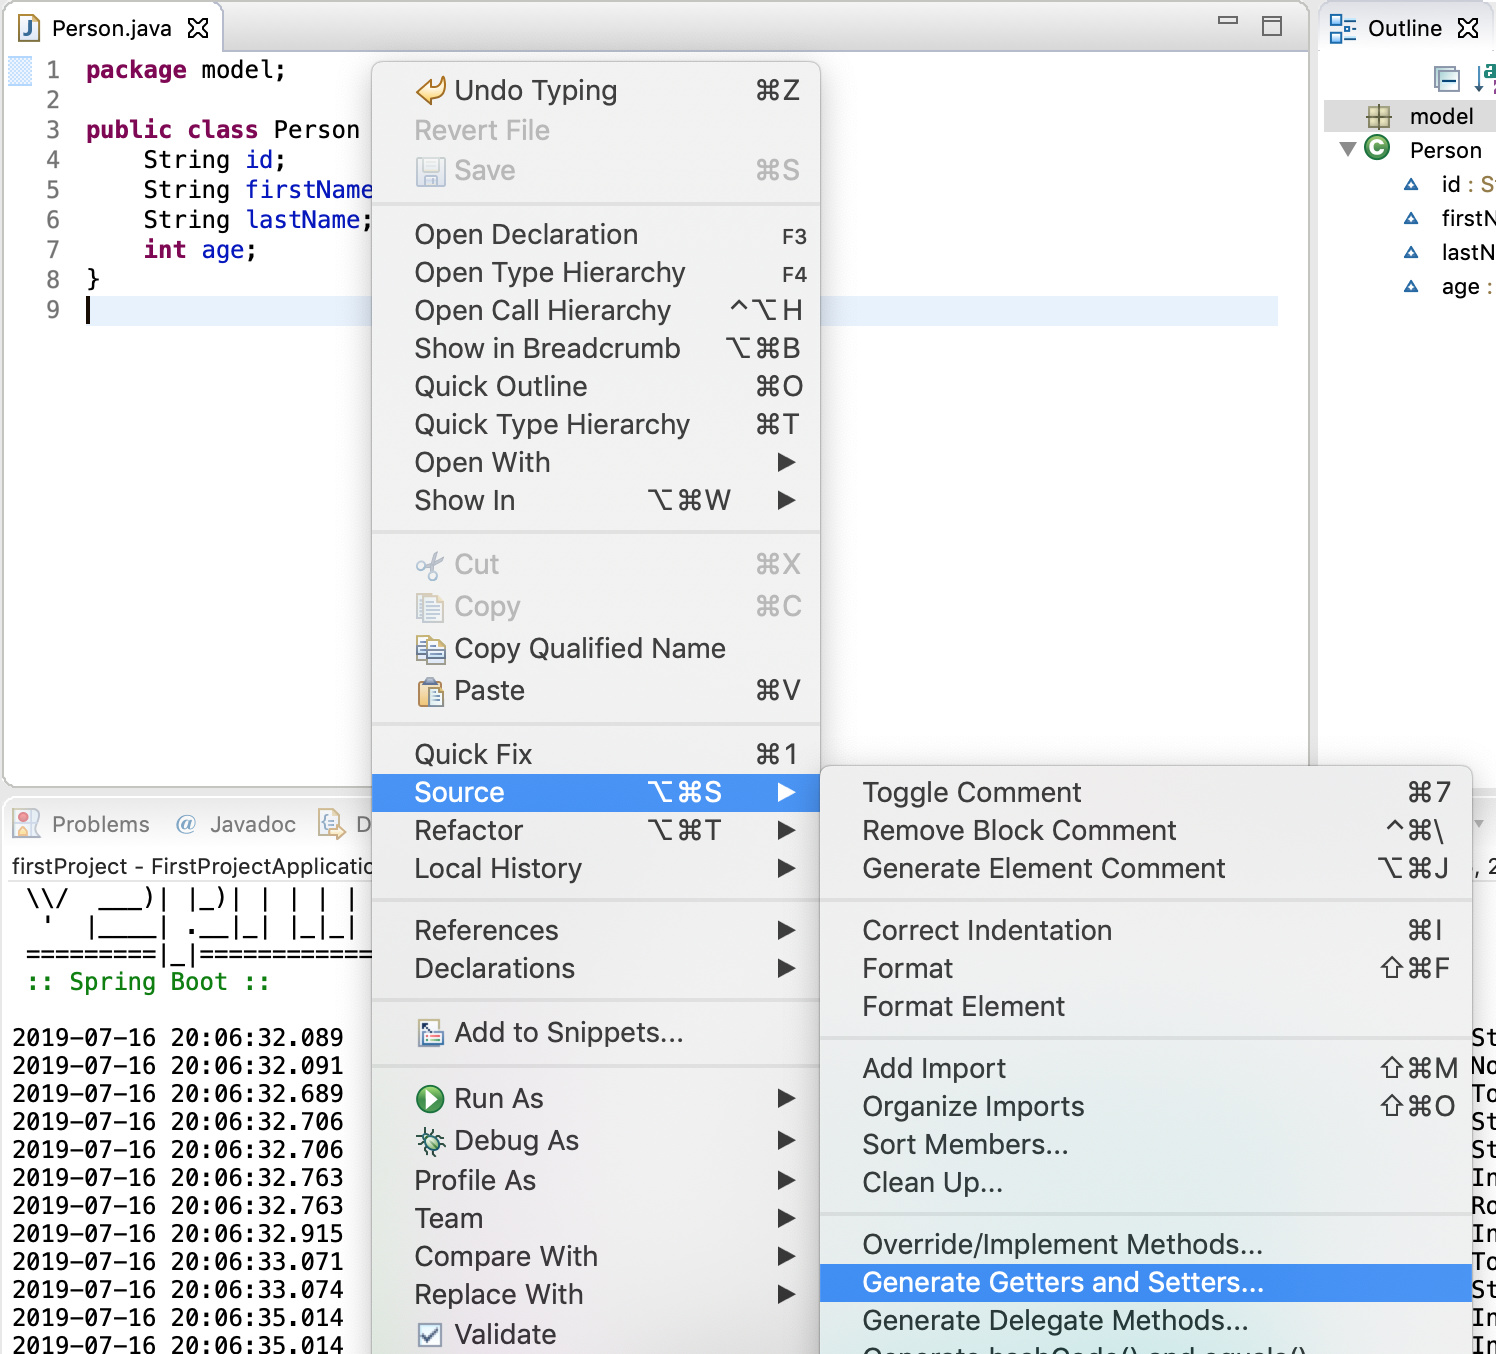
Person 클래스에서 마우스 오른쪽 클릭 > Source > Generate Getters and Setters를 선택합니다.
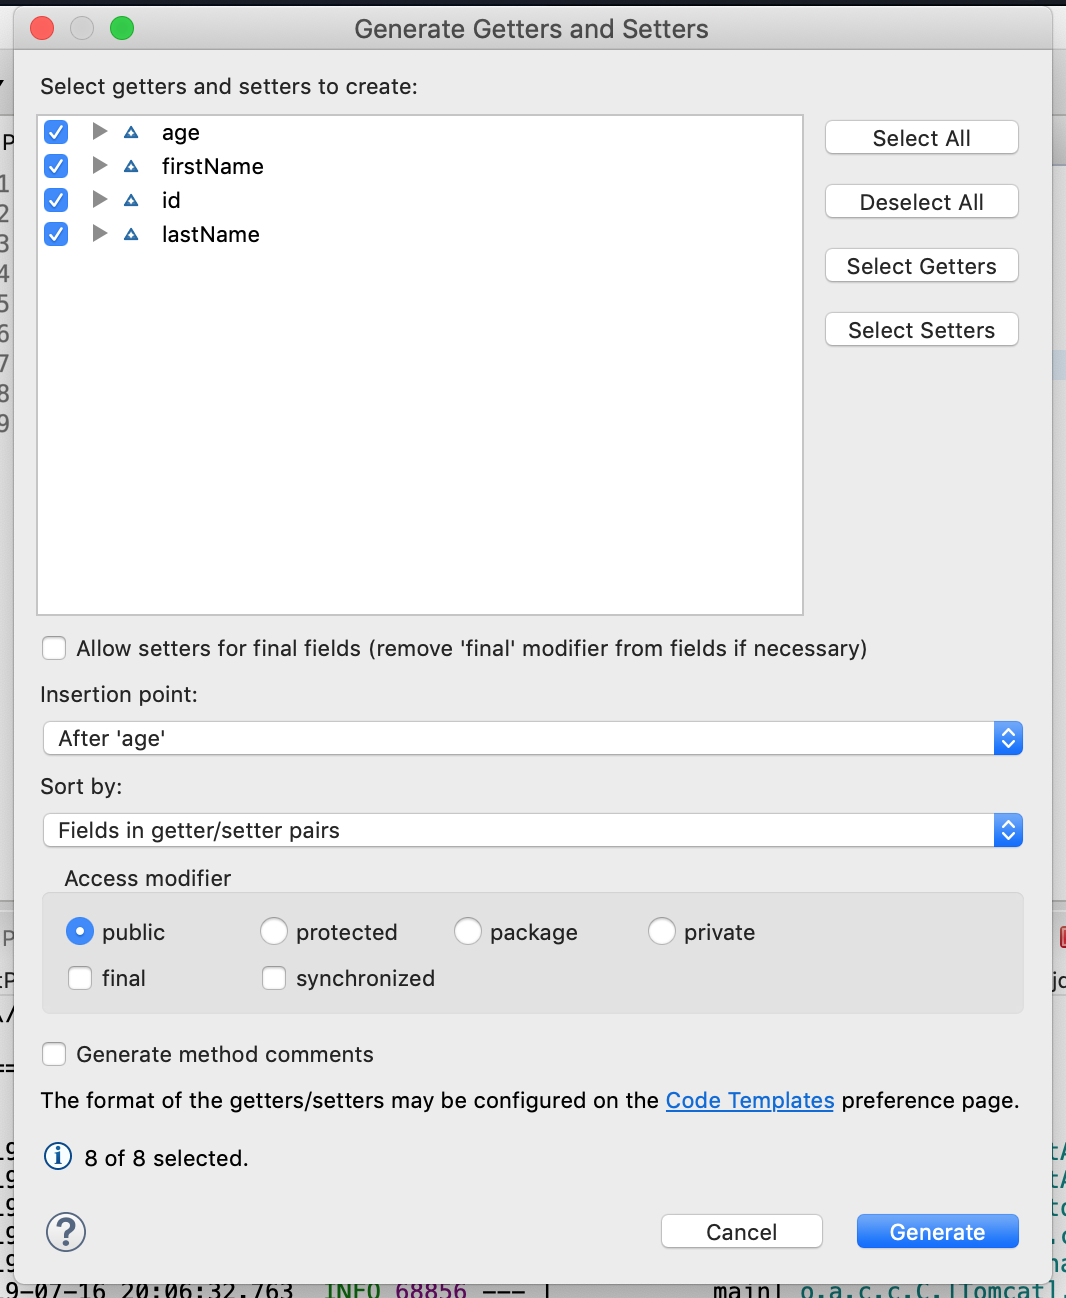
Select All 하고 Generate

Getters와 Setters가 추가되었습니다.
Service 추가하기
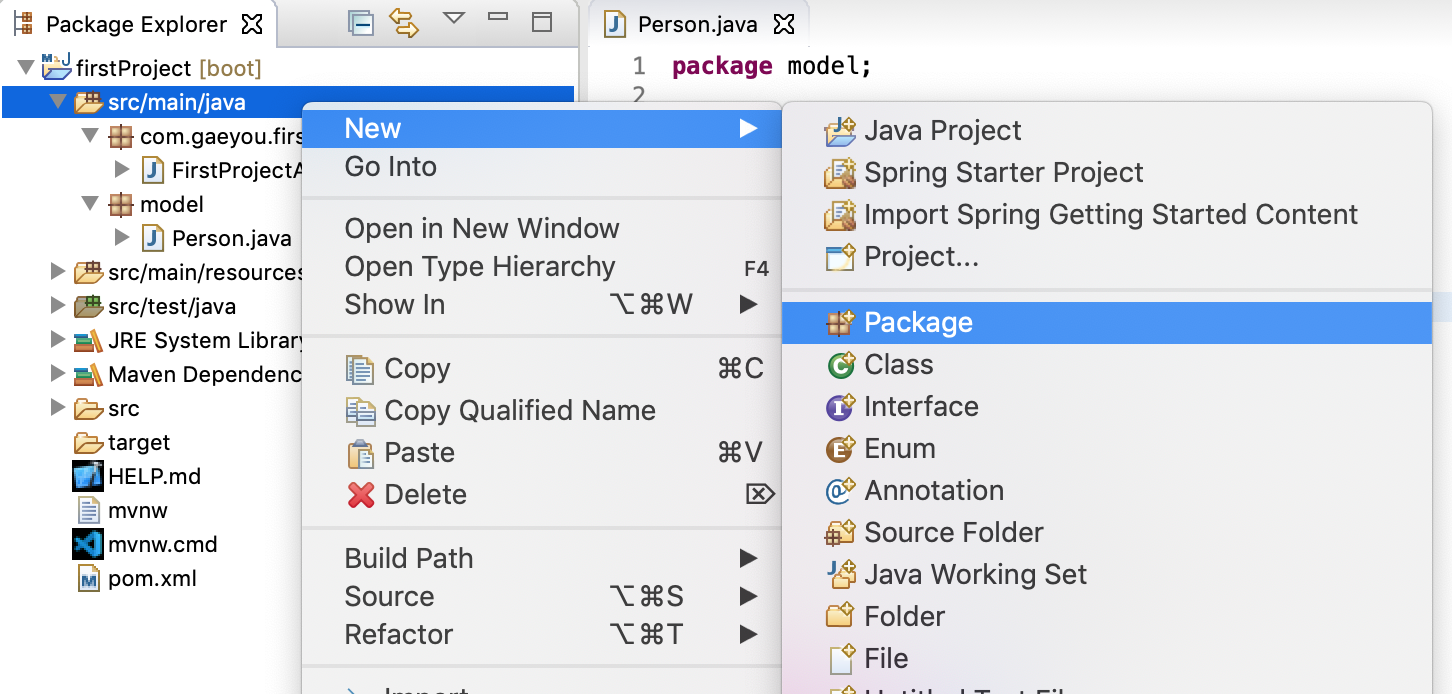
src/main/java 에서 New > Package를 선택합니다.
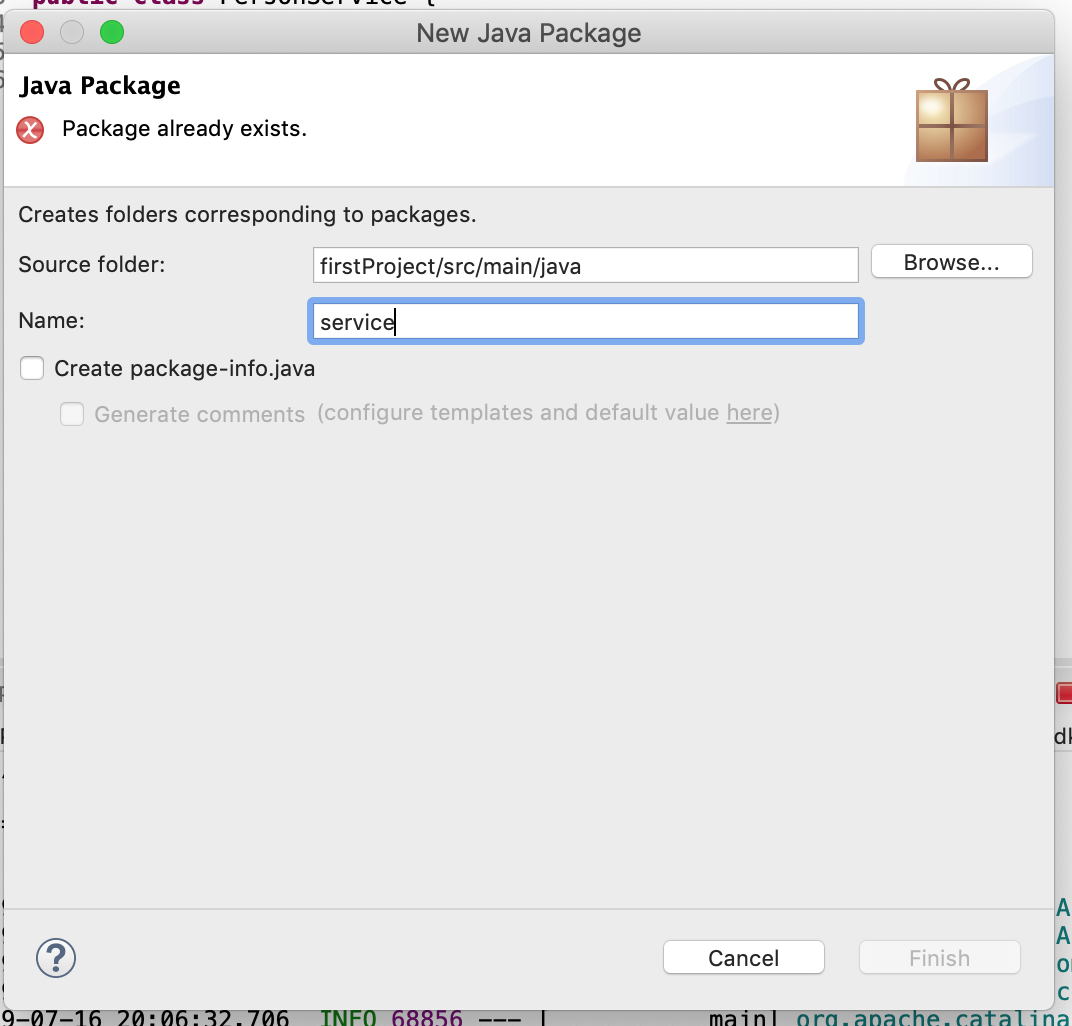
service를 추가합니다. ㅋ
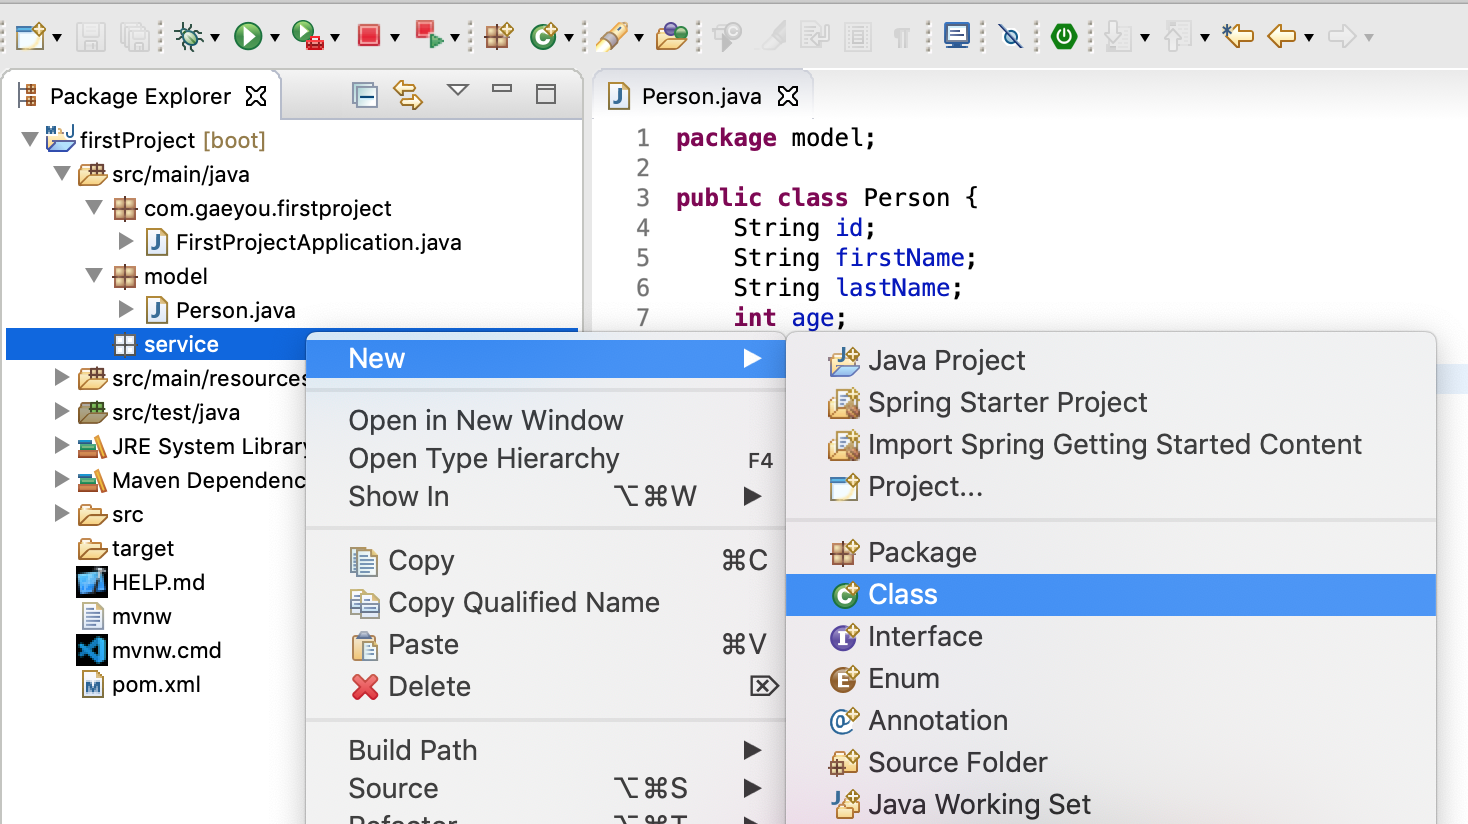
service에서 class를 추가합니다.
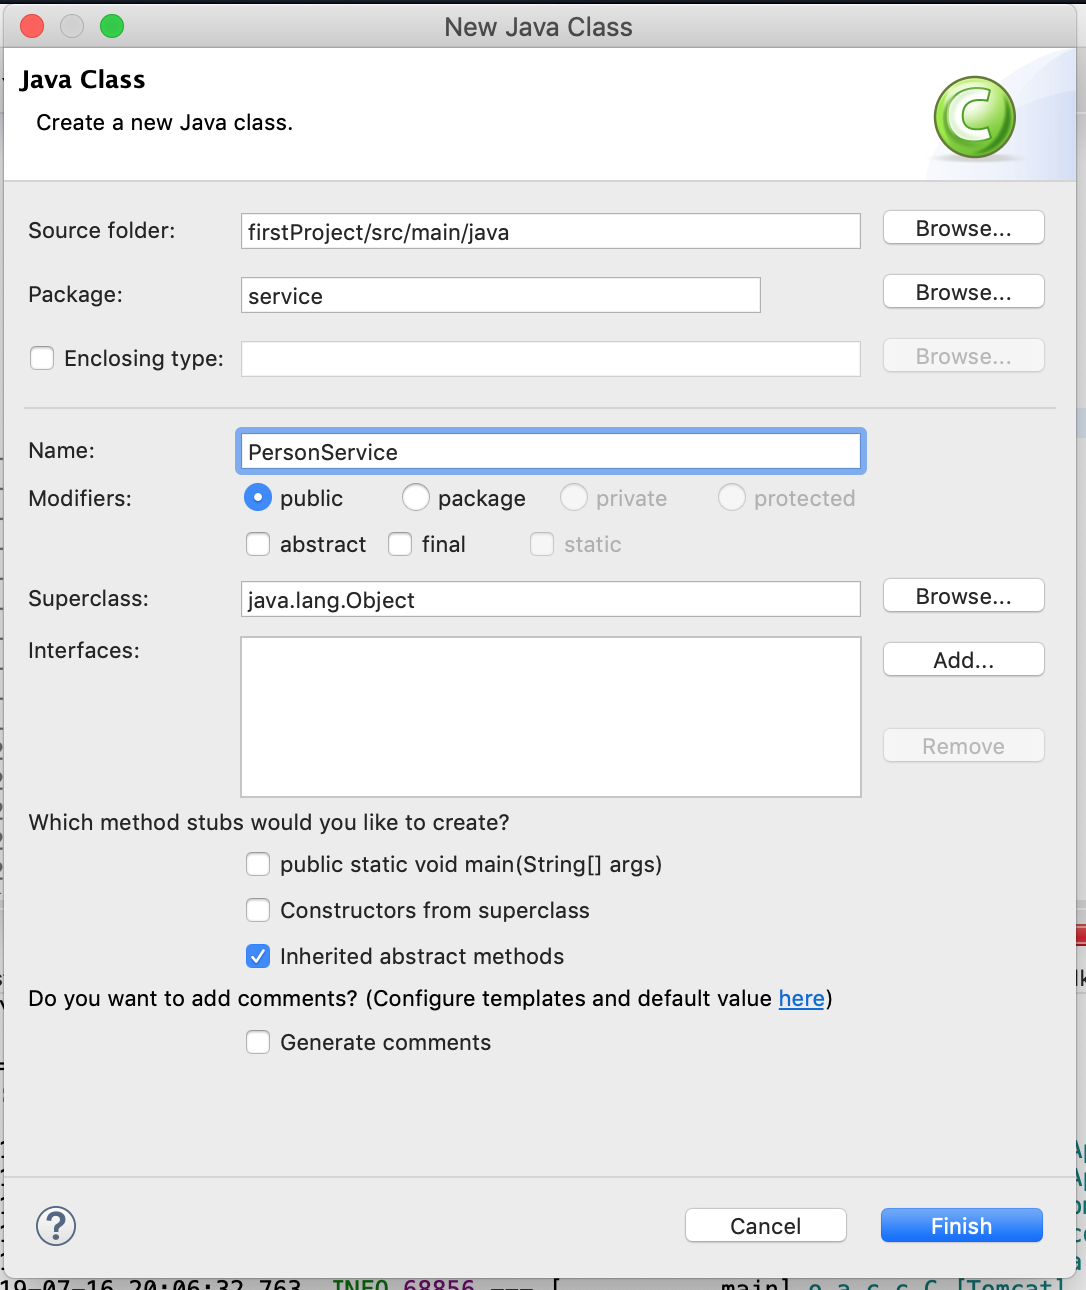
PersonService를 추가합니다.
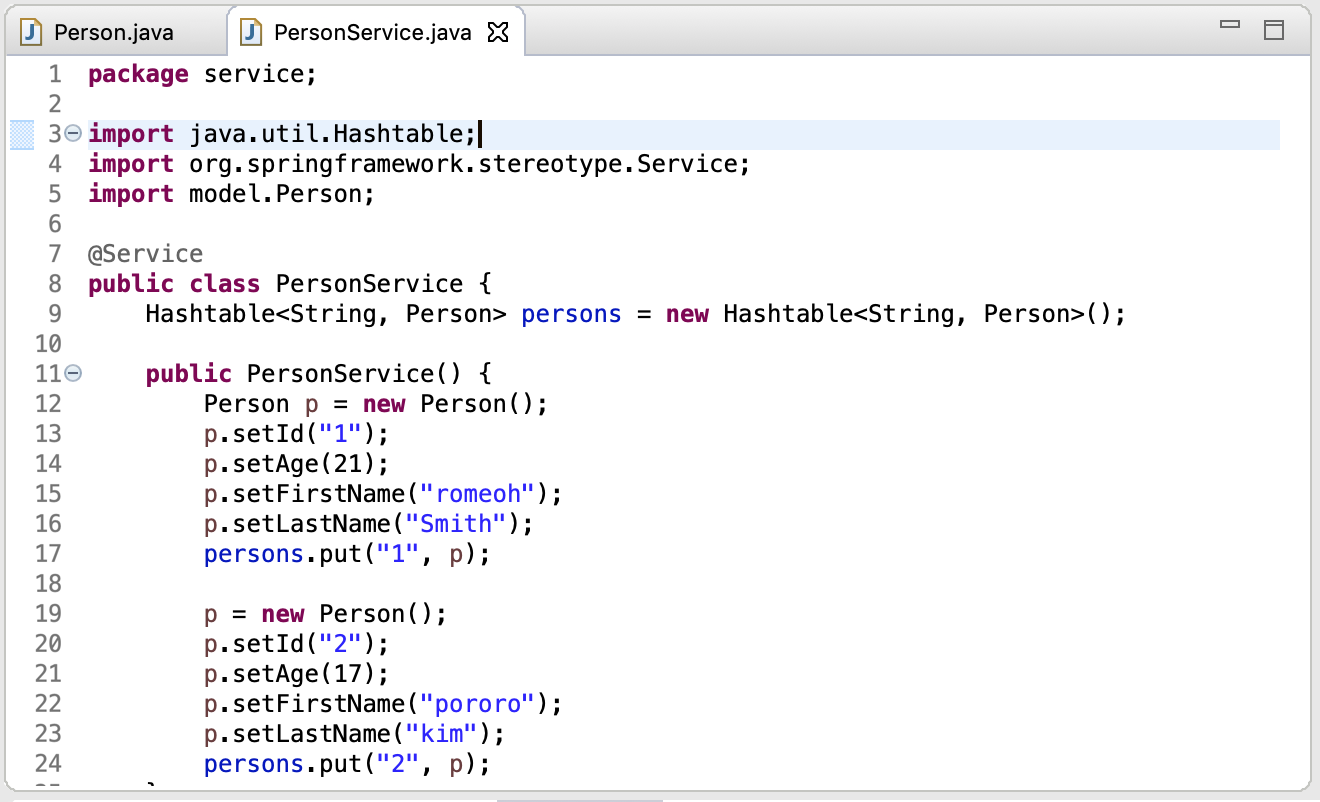
PersonService.java에 코드를 추가합니다.
package service;

import java.util.Hashtable;
import org.springframework.stereotype.Service;
import model.Person;

@Service
public class PersonService {
	Hashtable<String, Person> persons = new Hashtable<String, Person>();

	public PersonService() {
		Person p = new Person();
		p.setId("1");
		p.setAge(21);
		p.setFirstName("romeoh");
		p.setLastName("Smith");
		persons.put("1", p);

		p = new Person();
		p.setId("2");
		p.setAge(17);
		p.setFirstName("pororo");
		p.setLastName("kim");
		persons.put("2", p);
	}

	public Person getPerson(String id) {
		if (persons.containsKey(id)) {
			return persons.get(id);
		}
		return null;
	}

	public Hashtable<String, Person> getAll() {
		return persons;
	}
}
Controller 추가하기

Package를 추가합니다.
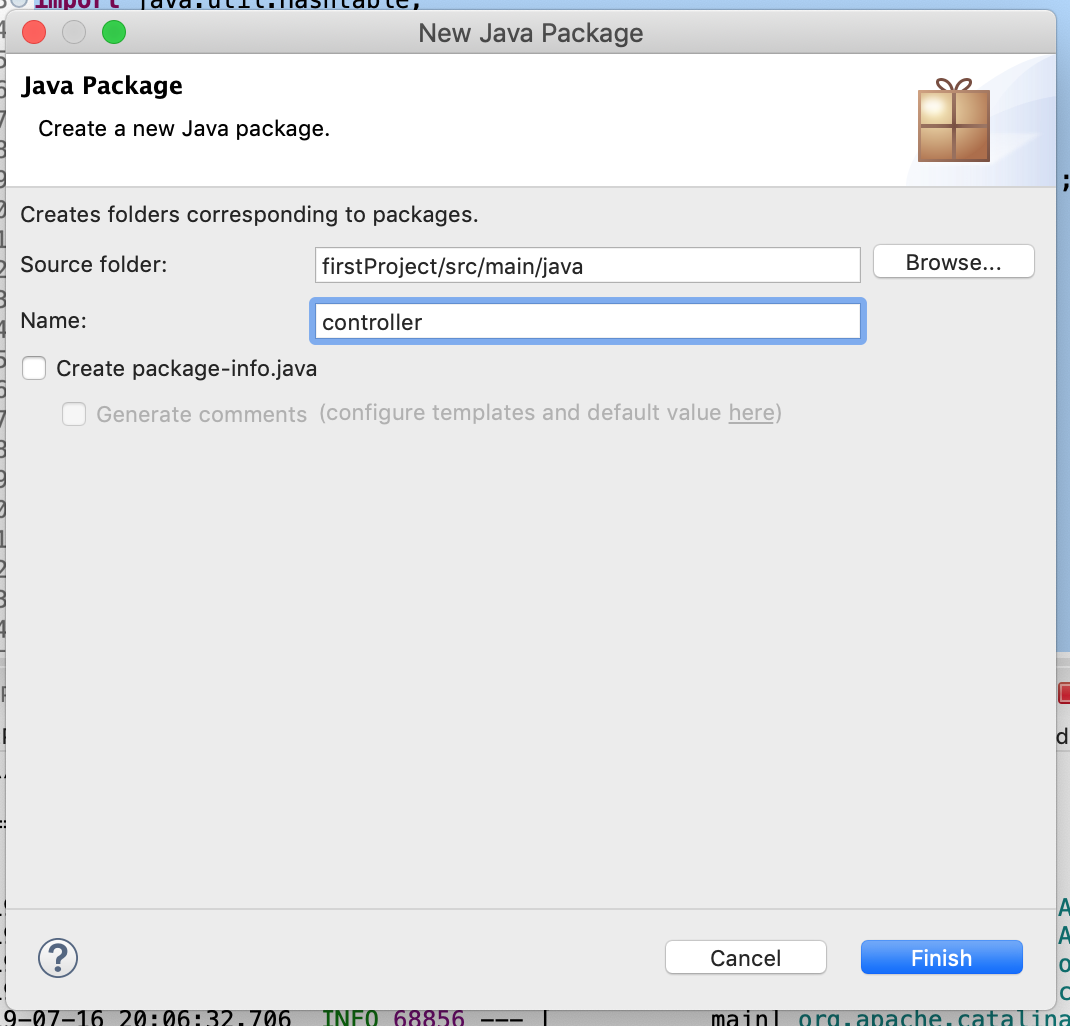
controller를 입력합니다.

class를 추가합니다.

PersonController를 추가합니다.
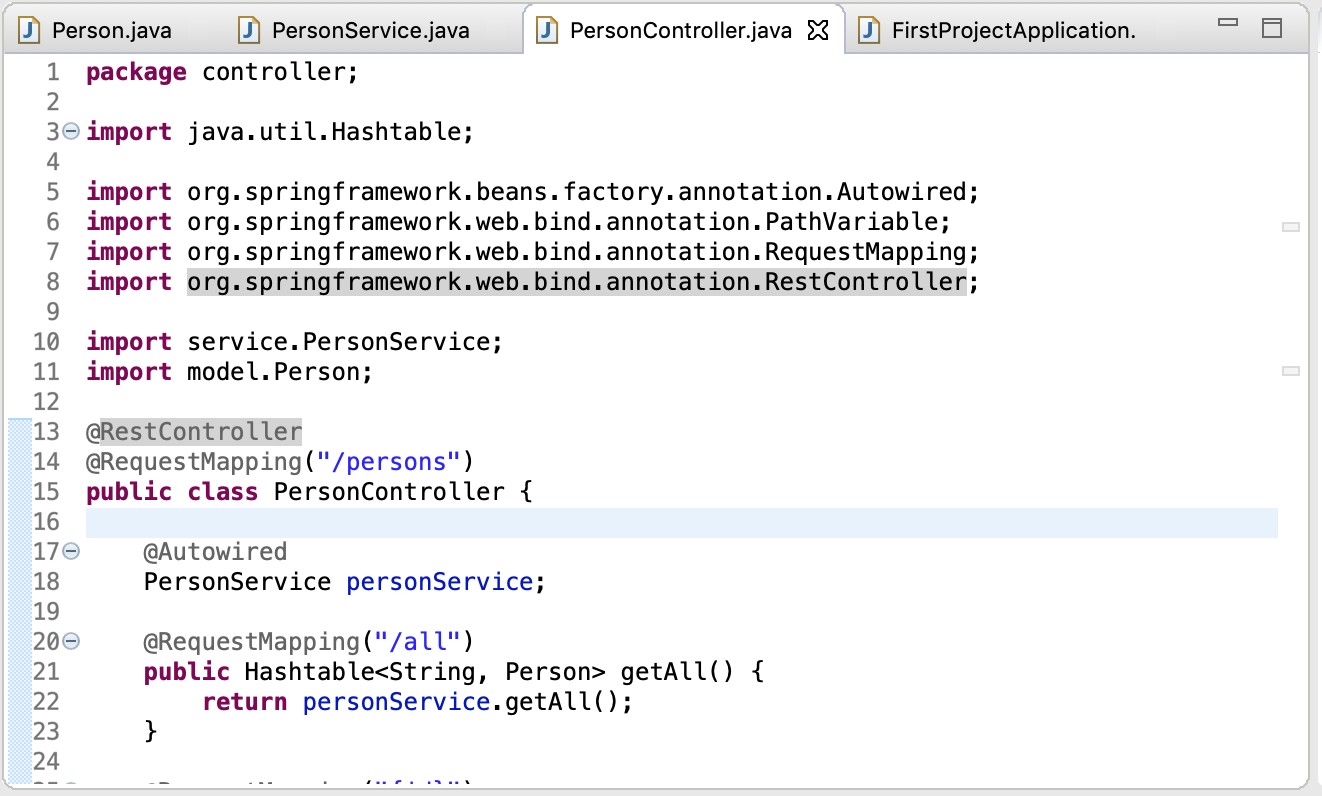
PersonController.java에 코딩합니다.
package controller;

import java.util.Hashtable;

import org.springframework.beans.factory.annotation.Autowired;
import org.springframework.web.bind.annotation.CrossOrigin;
import org.springframework.web.bind.annotation.PathVariable;
import org.springframework.web.bind.annotation.RequestMapping;
import org.springframework.web.bind.annotation.RestController;

import service.PersonService;
import model.Person;

@CrossOrigin
@RestController
@RequestMapping("/persons")
public class PersonController {

	@Autowired
	PersonService personService;

	@RequestMapping("/all")
	public Hashtable<String, Person> getAll() {
		return personService.getAll();
	}

	@RequestMapping("{id}")
	public Person getPerson(@PathVariable("id") String id) {
		return personService.getPerson(id);
	}
}
FirstProjectApplication.java 수정
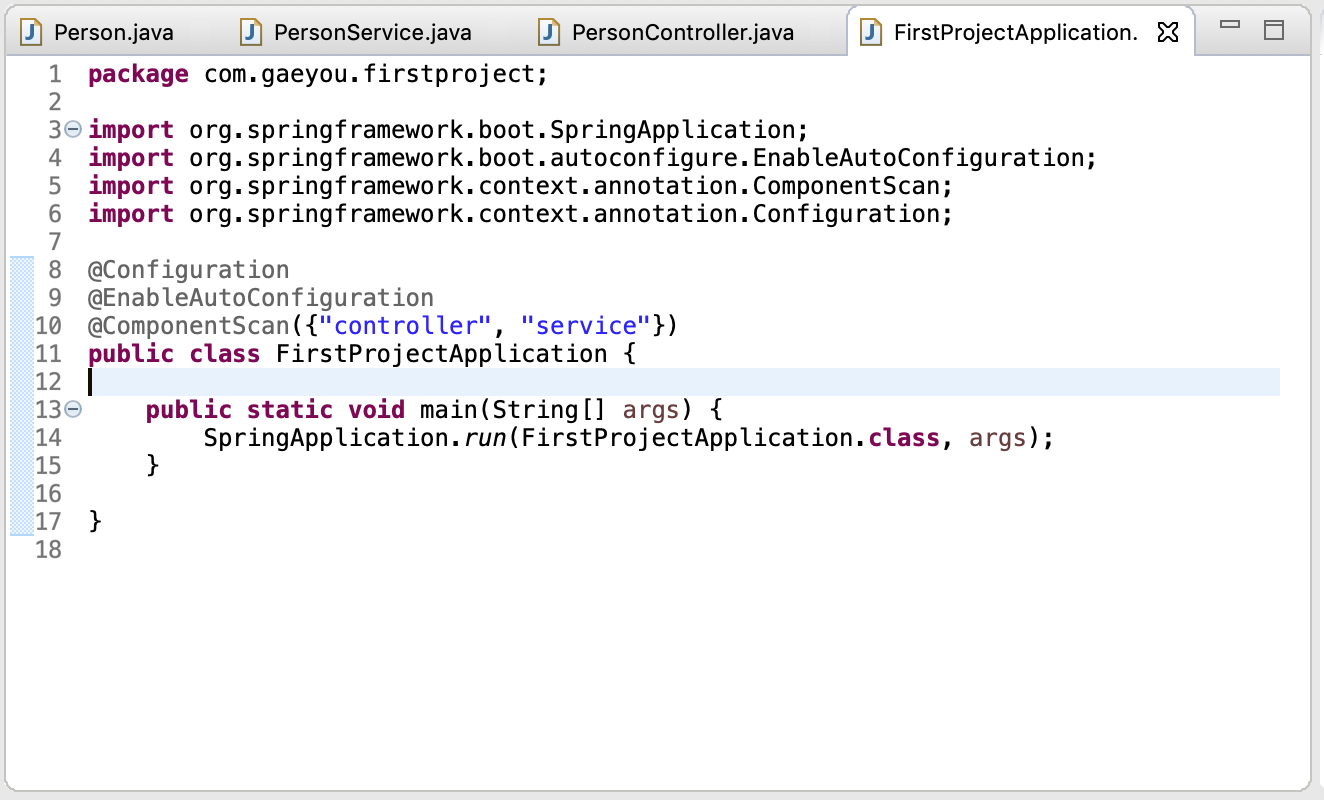
앞 포스트에서 Hello World를 찍었던 FirstProjectApplication.java 파일을 수정합니다.
package com.gaeyou.firstproject;

import org.springframework.boot.SpringApplication;
import org.springframework.boot.autoconfigure.EnableAutoConfiguration;
import org.springframework.context.annotation.ComponentScan;
import org.springframework.context.annotation.Configuration;

@Configuration
@EnableAutoConfiguration
@ComponentScan({"controller", "service"})
public class FirstProjectApplication {

	public static void main(String[] args) {
		SpringApplication.run(FirstProjectApplication.class, args);
	}

}
Tomcat 서버구동
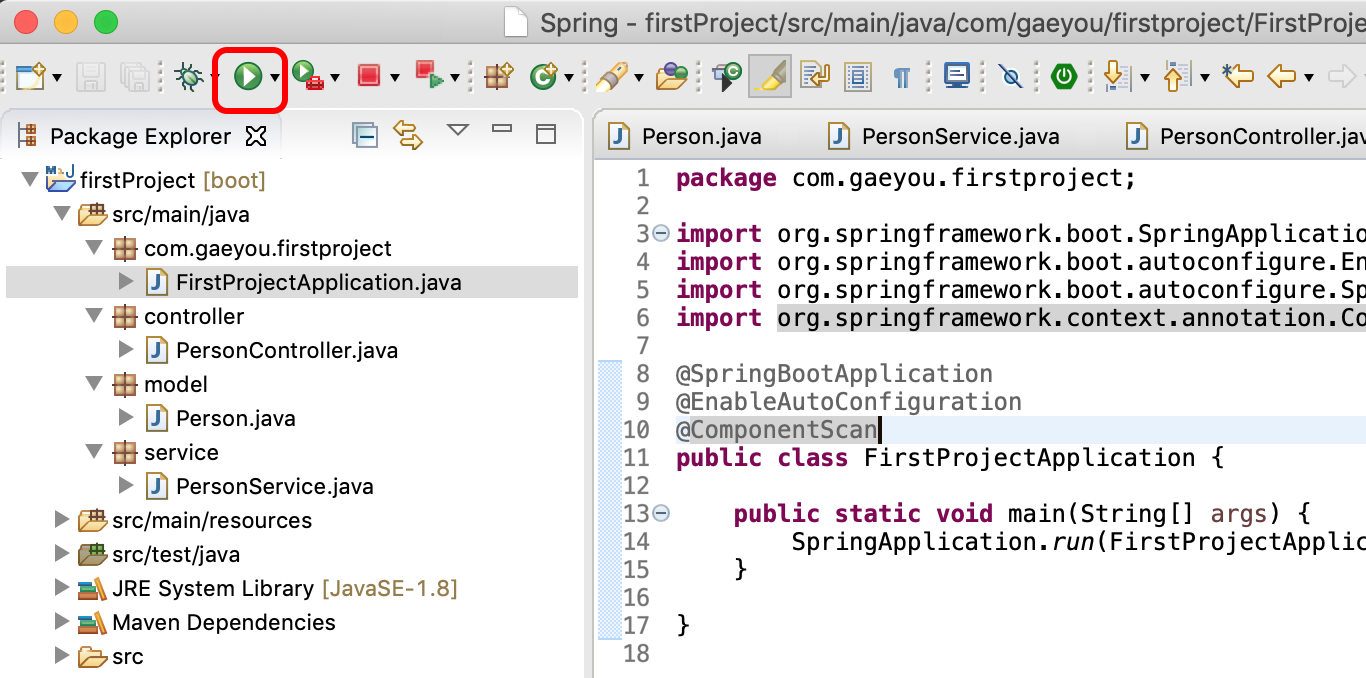

localhost:8080/persons/all
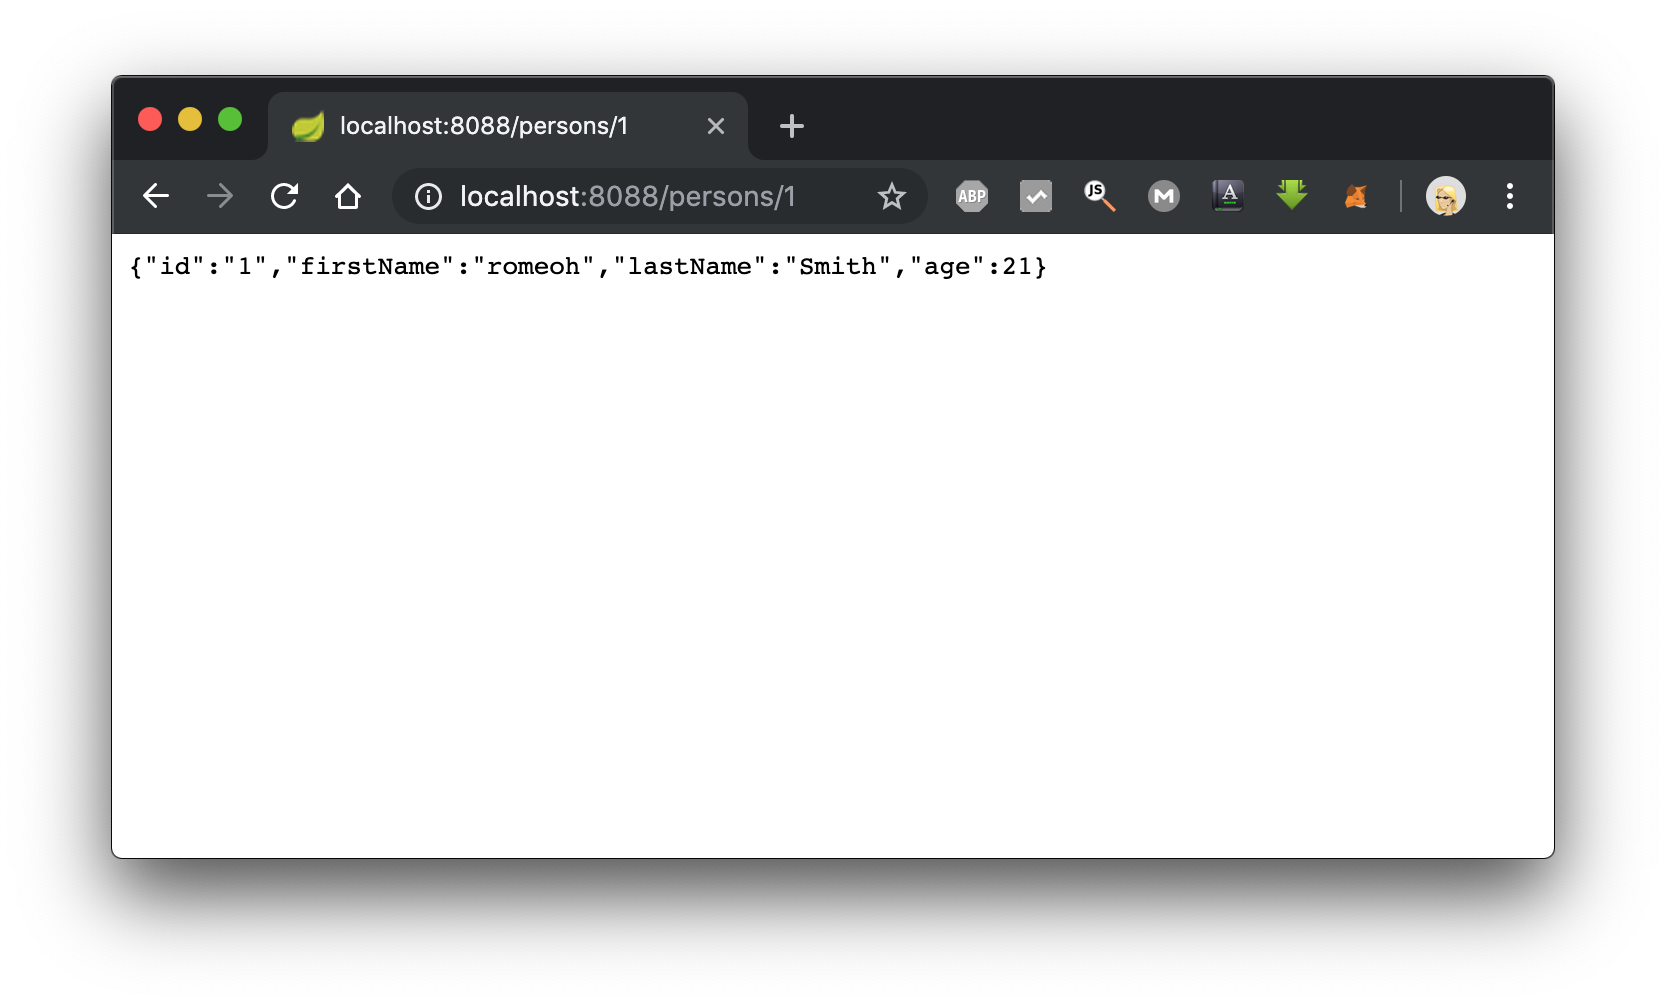
localhost:8080/persons/1
json이 출력되는 것을 확인 할 수 있습니다.
xml로 출력하기

model/Person.java 클래스에 @XmlRootElement annotation을 추가하고
서버를 재구동합니다.

view-source:http://localhost:8088/persons/2
소스보기를 하면 xml로 출력되는것을 알 수 있습니다.
배포하기

pom.xml을 열어서 OverView > Packaging을 jar에서 war로 변경합니다.

Run As > Maven build...를 선택합니다.
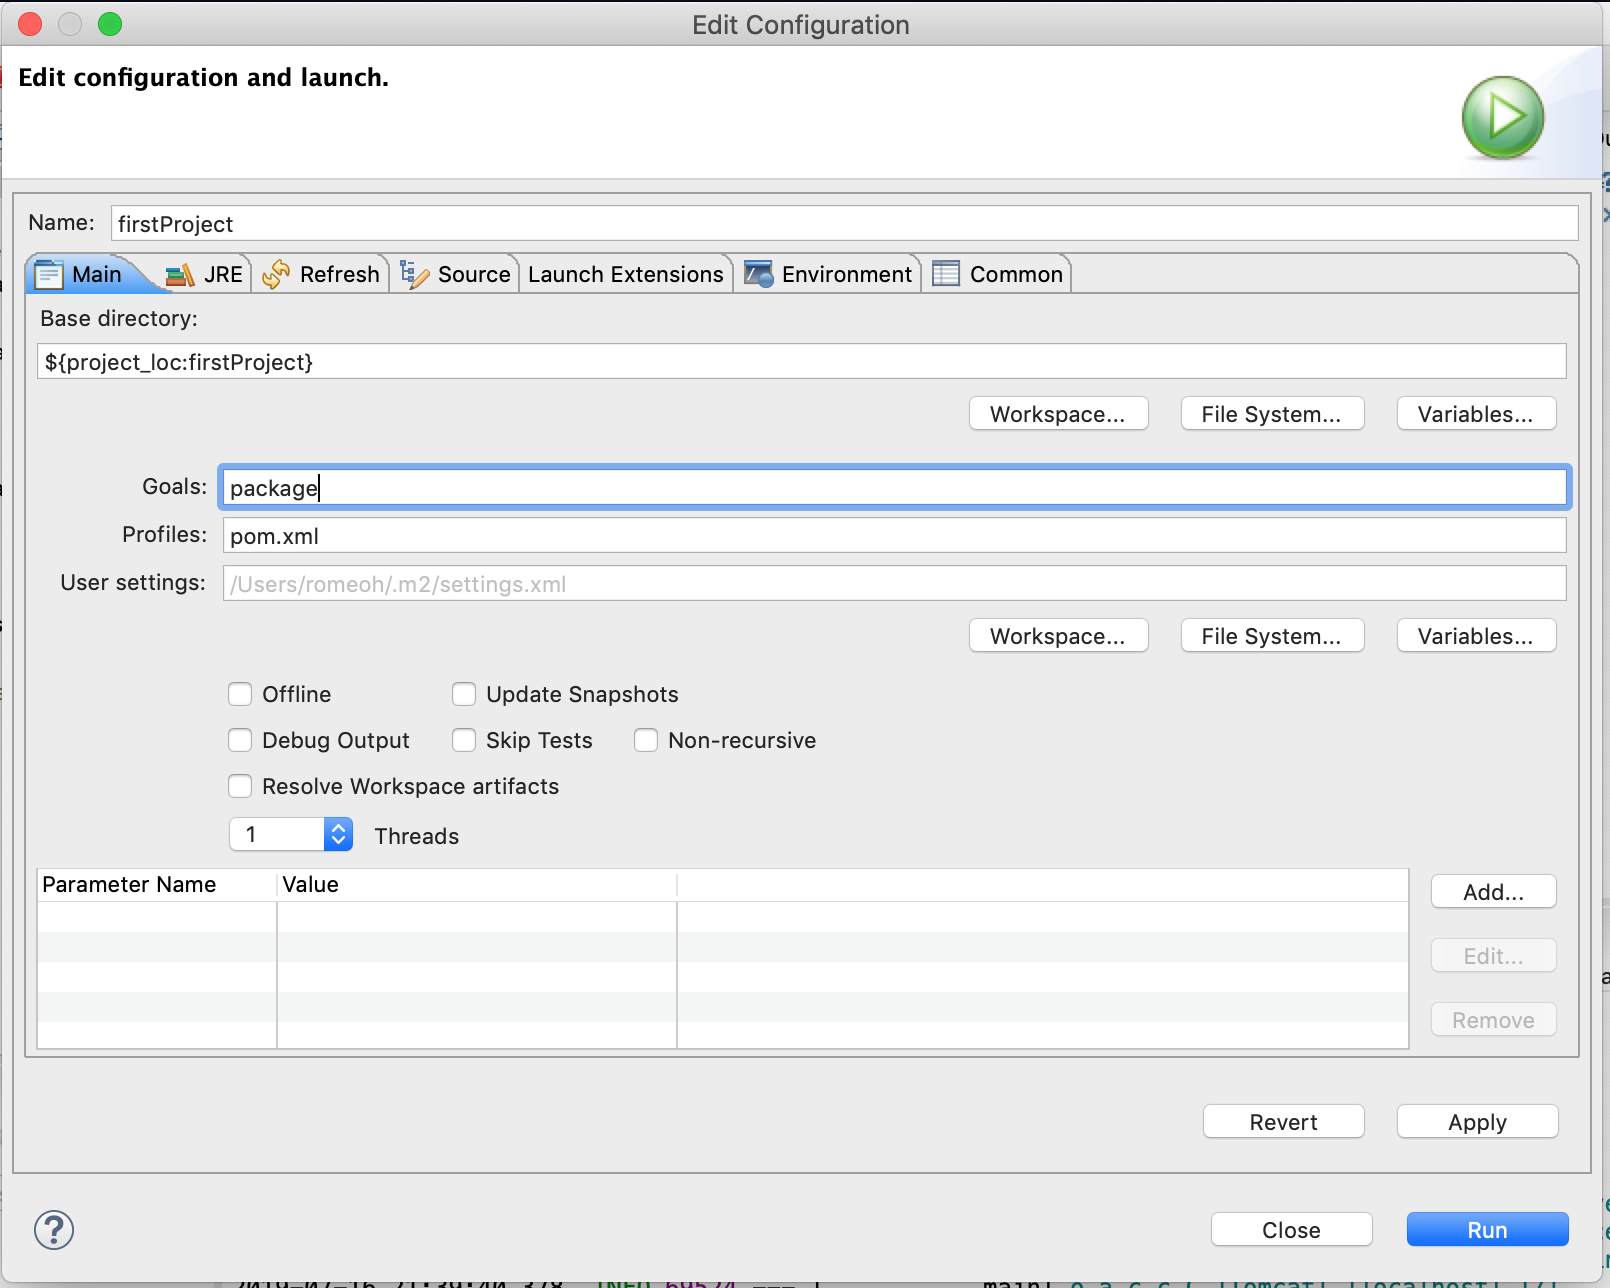
Goals에 package를 입력하고 Run 버튼을 누릅니다.

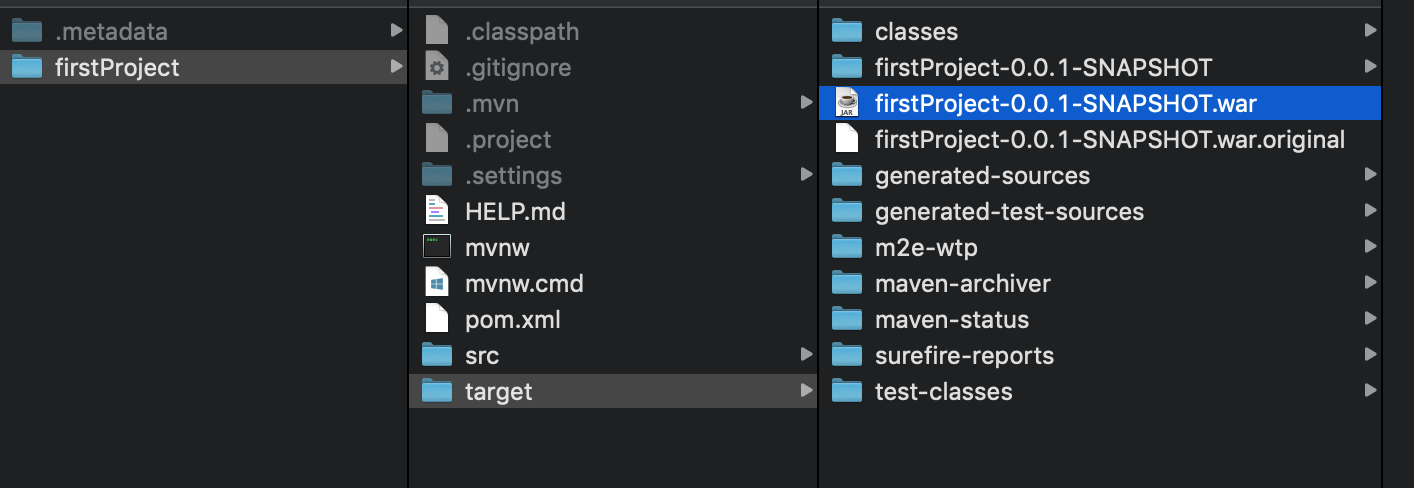
war 파일이 생성되었습니다.
Maven build 중에 maven-surefire-plugin 관련 오류가 발생하면
pom.xml에 maven-surefire-plugin plugin을 추가합니다.
아래는 pom.xml 최종입니다.
<?xml version="1.0" encoding="UTF-8"?>
<project xmlns="http://maven.apache.org/POM/4.0.0" xmlns:xsi="http://www.w3.org/2001/XMLSchema-instance"
	xsi:schemaLocation="http://maven.apache.org/POM/4.0.0 http://maven.apache.org/xsd/maven-4.0.0.xsd">
	<modelVersion>4.0.0</modelVersion>
	<parent>
		<groupId>org.springframework.boot</groupId>
		<artifactId>spring-boot-starter-parent</artifactId>
		<version>2.1.6.RELEASE</version>
		<relativePath/> <!-- lookup parent from repository -->
	</parent>
	<groupId>com.gaeyou</groupId>
	<artifactId>firstProject</artifactId>
	<version>0.0.1-SNAPSHOT</version>
	<name>firstProject</name>
	<description>Demo project for Spring Boot</description>

	<properties>
		<java.version>1.8</java.version>
	</properties>

	<dependencies>
		<dependency>
			<groupId>org.springframework.boot</groupId>
			<artifactId>spring-boot-starter-web</artifactId>
		</dependency>

		<dependency>
			<groupId>org.springframework.boot</groupId>
			<artifactId>spring-boot-starter-test</artifactId>
			<scope>test</scope>
		</dependency>
	</dependencies>

	<build>
		<plugins>
			<plugin>
				<groupId>org.springframework.boot</groupId>
				<artifactId>spring-boot-maven-plugin</artifactId>
			</plugin>
			<plugin>
			    <groupId>org.apache.maven.plugins</groupId>
			    <artifactId>maven-surefire-plugin</artifactId>
			    <version>2.19.1</version>
			    <configuration>
			        <testFailureIgnore>true</testFailureIgnore>
			    </configuration>
			</plugin>
		</plugins>

	</build>

	<packaging>war</packaging>
</project>
'Backend > Spring' 카테고리의 다른 글
| [Spring Boot] Spring Boot - My Batis 연동 - Oracle (12) | 2019.09.19 |
|---|---|
| [Eclipse] Debug shell 사용하기 (0) | 2019.08.28 |
| [Spring Boot] lombok 설정하기 - Mac / Windows (0) | 2019.08.24 |
| [Spring Boot] Logback 설정하기 (2) | 2019.08.23 |
| [Spring Boot] 스프링 부트 환경설정 (1) | 2019.07.17 |


