
| 일 | 월 | 화 | 수 | 목 | 금 | 토 |
|---|---|---|---|---|---|---|
| 1 | 2 | 3 | 4 | |||
| 5 | 6 | 7 | 8 | 9 | 10 | 11 |
| 12 | 13 | 14 | 15 | 16 | 17 | 18 |
| 19 | 20 | 21 | 22 | 23 | 24 | 25 |
| 26 | 27 | 28 | 29 | 30 | 31 |
- linux
- 맥
- Android
- MAC
- Chrome
- localserver
- 티스토리챌린지
- 개발
- pydantic
- VirtualBox
- 오블완
- build
- webpack
- xcode
- TensorFlow
- 네트워크
- androidstudio
- ReactNative
- node
- react
- vsCode
- fastapi
- IOS
- PYTHON
- unittest
- 리눅스
- MachineLearning
- 센토스
- centos
- Today
- Total
로메오의 블로그
[React Native] 디바이스에 Local Server 구동하기 본문
[REACT NATIVE] WEBVIEW와 INTERFACE 하기
위 포스트에서 React Native에 Webview를 띄우고 Firebase hosting의 html 파일을 불러와서 띄우는것을 했습니다.
html파일을 리모트 서버에 두지 않고 디바이스 내에 두려고 합니다.
그런데 이때 문제가 디바이스 storage의 js파일은 Ajax 통신이 불가능합니다.
이럴경우 디바이스에 Local Server를 구동하면 리소스 로딩 속도도 빠르고
Ajax 통신도 가능합니다.
프로젝트 생성
$ cd /my/project/path
$ react-native init secondProject --version react-native@0.59.8
$ cd secondProject
$ code .
firstProject는 firebase hosting을 계속 업그레이드 할 예정이기 때문에 secondProject를 생성했습니다.
앞 포스트에서 React Native 0.60과 react-native-webview는 interface에 문제가 있기 때문에 0.59.8 버전으로 생성했습니다.
(이 포스트에서는 interface를 하지 않기 때문에 0.60을 사용해도 무관합니다.)
모듈 설치
$ npm install react-native-webview
$ react-native link react-native-webview
$ npm install react-native-static-server
$ react-native link react-native-static-server
$ npm install react-native-fs
$ react-native link react-native-fs
3개의 모듈을 설치하고 react-native link 합니다.
react-native-webview: 웹뷰
react-native-static-server: local server를 구동함
react-native-fs: 디바이스 file system 관리
package.json 결과입니다.
{
  "name": "secondProject",
  "version": "0.0.1",
  "private": true,
  "scripts": {
    "start": "node node_modules/react-native/local-cli/cli.js start",
    "test": "jest"
  },
  "dependencies": {
    "react": "16.8.3",
    "react-native": "0.59.8",
    "react-native-fs": "^2.13.3",
    "react-native-static-server": "^0.4.2",
    "react-native-webview": "^5.12.1"
  },
  "devDependencies": {
    "@babel/core": "7.5.4",
    "@babel/runtime": "7.5.4",
    "babel-jest": "24.8.0",
    "jest": "24.8.0",
    "metro-react-native-babel-preset": "0.55.0",
    "react-test-renderer": "16.8.3"
  },
  "jest": {
    "preset": "react-native"
  }
}
loading.html 만들기
$ mkdir www
$ touch www/loading.html
서버가 구동되기 전까지 사용할 loading 파일을 만듭니다.
App.js
import React, { Component } from 'react';
import { Platform, StyleSheet, View } from 'react-native';
import { WebView } from 'react-native-webview'
import StaticServer from 'react-native-static-server';
import RNFS from 'react-native-fs';

const port = 9898;

// local server의 home 디렉토리를 지정합니다.
const documentPath = RNFS.DocumentDirectoryPath;

// local server에 port와 document path를 지정합니다.
const server = new StaticServer(port, documentPath);

export default class App extends Component {

    constructor(props) {
        super(props);
        this.state = {
            indexPage: Platform.OS === 'ios'
                ? require('./www/loading.html')
                : { uri: 'file:///android_asset/loading.html' },
        };
    }

    componentDidMount() {

        // 서버를 구동합니다.
        server.start().then(url => {
            console.log('server start at: ' + documentPath + ' [' + url + ']');
        })
    }

    componentWillUnmount() {
        // 서버 정지
        server.stop();
    }

    render() {
        return (
            <View style={styles.container}></View>
        );
    }
}

const styles = StyleSheet.create({
    container: {
        flex: 1,
    }
});
iOS Build 하기
$ react-native start --reset-cache$ react-native run-ios터미널 두개에 각 명령을 입력합니다.


static server가 구동되면 크롬 console에 document path와 local server IP가 출력됩니다.
document path를 복사합니다.

파인더에서 이동 > 폴더로 이동을 누릅니다.

경로를 붙여넣기 해서 document directory를 엽니다.
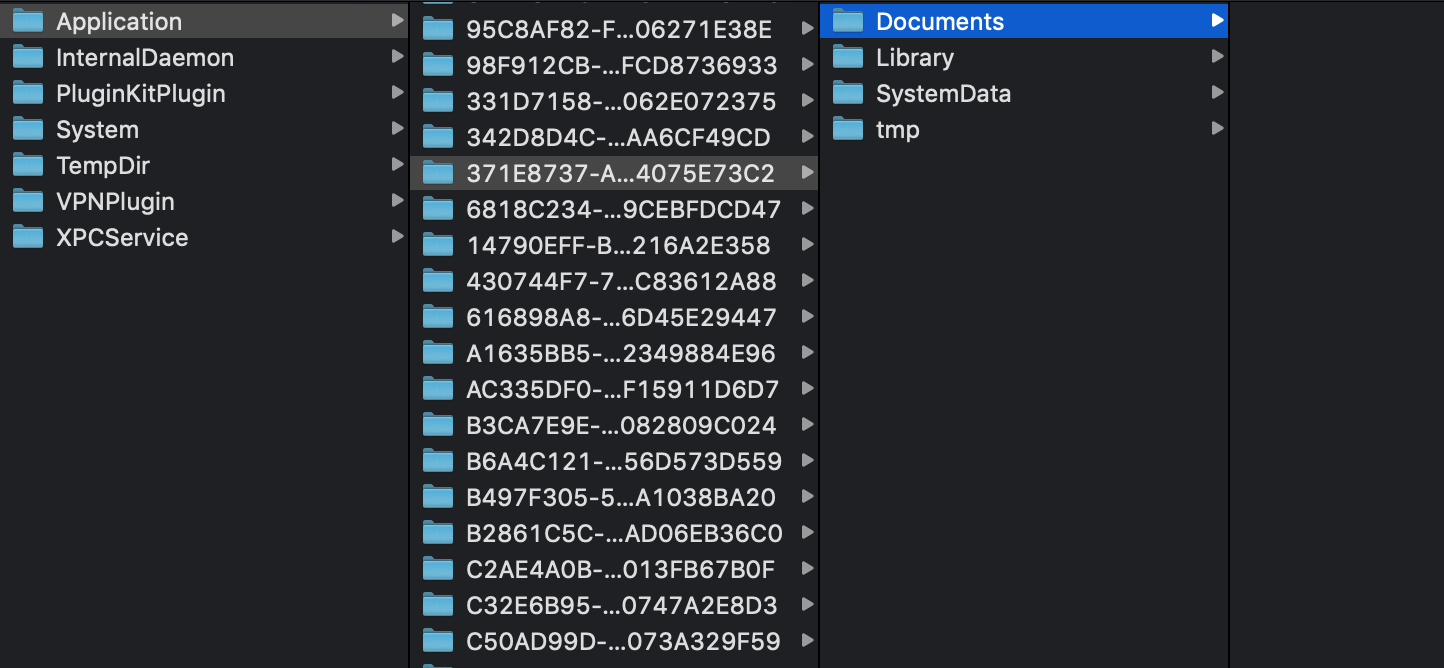
Documents 폴더에 index.html 파일을 추가합니다.
index.html
<html>
    <head>
        <meta name="viewport" content="width=device-width,initial-scale=1.0,minimum-scale=1.0,maximum-scale=1.0,user-scalable=no">
        <title>hello world</title>
    </head>

    <body style="margin-top: 100px">
        <h1>hello world</h1>
    </body>
</html>
Android Build 하기
$ react-native run-android
Android도 document path와 local server IP가 표시됩니다.

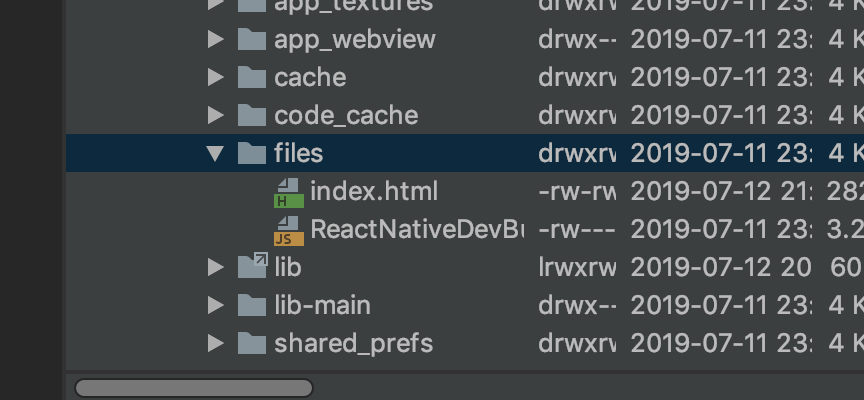
Android Studio > View > Tool Windows > Device File Explorer를 선택합니다.
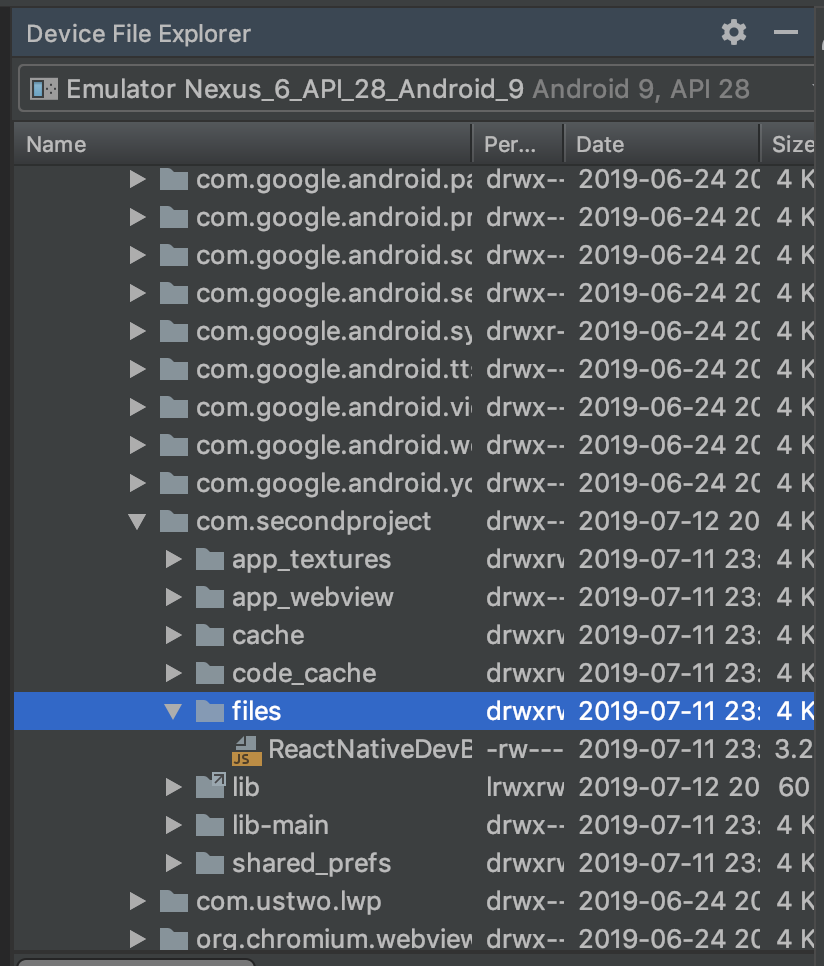

경로를 찾아가서 Upload를 눌러서 index.html 파일을 넣어 줍니다.
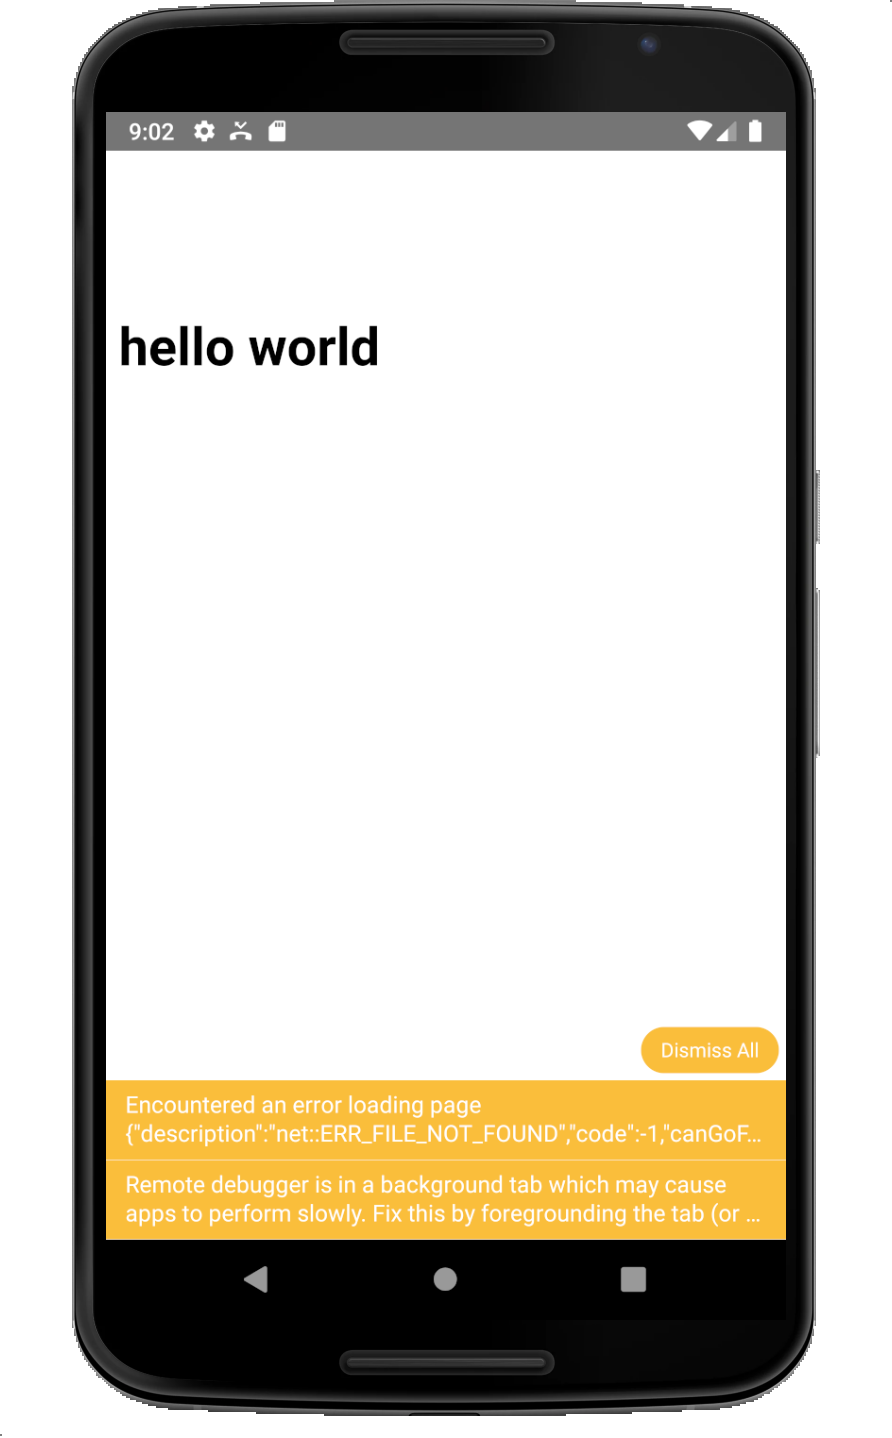
App을 새로고침 하면 local server에서 index.html 파일을 가져와서 보여줍니다.
이렇게 document path에 파일을 직접 넣어주는 방식이라면 아무짝에 쓸모없는 앱이 되겠지요.ㅎ
다음 포스트에서 firebase에서 리소스 zip파일을 다운로드 해서 압축 풀어서 index.html파일을 보여주는 내용을 다루어 보겠습니다.
'App & OS > Hybrid' 카테고리의 다른 글
| [React Native] 특정버전으로 프로젝트 생성하기 (0) | 2019.07.22 |
|---|---|
| [React Native] 리소스 파일 다운로드하기 (zip 압축해제) (3) | 2019.07.13 |
| [React Native] Webview와 interface 하기 (9) | 2019.07.12 |
| [React Native] release 모드로 build 하기 (0) | 2019.07.09 |
| [React Native] Project 이름 변경하기 (2) | 2019.07.06 |


