반응형
Notice
Recent Posts
Recent Comments
Link
| 일 | 월 | 화 | 수 | 목 | 금 | 토 |
|---|---|---|---|---|---|---|
| 1 | 2 | 3 | 4 | 5 | 6 | 7 |
| 8 | 9 | 10 | 11 | 12 | 13 | 14 |
| 15 | 16 | 17 | 18 | 19 | 20 | 21 |
| 22 | 23 | 24 | 25 | 26 | 27 | 28 |
Tags
- webpack
- VirtualBox
- xcode
- androidstudio
- MAC
- 맥
- IOS
- MachineLearning
- localserver
- Chrome
- 네트워크
- pydantic
- linux
- unittest
- 리눅스
- node
- 센토스
- PYTHON
- vsCode
- Android
- ReactNative
- react
- centos
- 오블완
- fastapi
- 티스토리챌린지
- TensorFlow
- 개발
- build
Archives
- Today
- Total
로메오의 블로그
[CentOS] Apache 설치 본문
반응형
apache 설치확인
# yum list installed | grep httpdapache 설치
# yum install httpdyum으로 설치시 설치경로는 /etc/httpd 디렉토리입니다.
시스템 부팅시 자동으로 실행되도록 설정합니다.
# systemctl enable httpd.service아파치 서버를 시작합니다.
# systemctl start httpd방화벽을 설치합니다.
# yum -y install system-config-firewall-tui포트를 허용하기 위해 스크립트를 실행합니다.
# vi /etc/sysconfig/iptables
키보드 i 를 눌러서 아래 스크립트를 추가합니다.
...
-A INPUT -p tcp -m state --state NEW -m tcp --dport 80 -j ACCEPT
-A INPUT -p tcp -m state --state NEW -m tcp --dport 21 -j ACCEPT
-A INPUT -p tcp -m state --state NEW -m tcp --dport 22 -j ACCEPT
-A INPUT -p tcp -m state --state NEW -m tcp --dport 3306 -j ACCEPT
...
일반적으로 프로토콜에 따른 네트워크 포트는 아래와 같습니다.
FTP: 21
SSH: 22
TELNET: 23
SMTP: 25
DNS: 53
HTTP: 80
POP3: 110
IMAP: 143
HTTPS: 443
RDP: 3389
MYSQL: 3306
필요한 포트를 추가했으면 esc 키를 누르고 :wq 를 입력해서 편집을 종료합니다.
방화벽 Demon disable
# systemctl mask firewalld부팅시 자동시작
# systemctl enable iptables.service방화벽 시작
# systemctl start iptablesApache 구동확인
# ps -ef | grep httpd
Apache 구동 port 확인
# netstat -anp | grep httpd
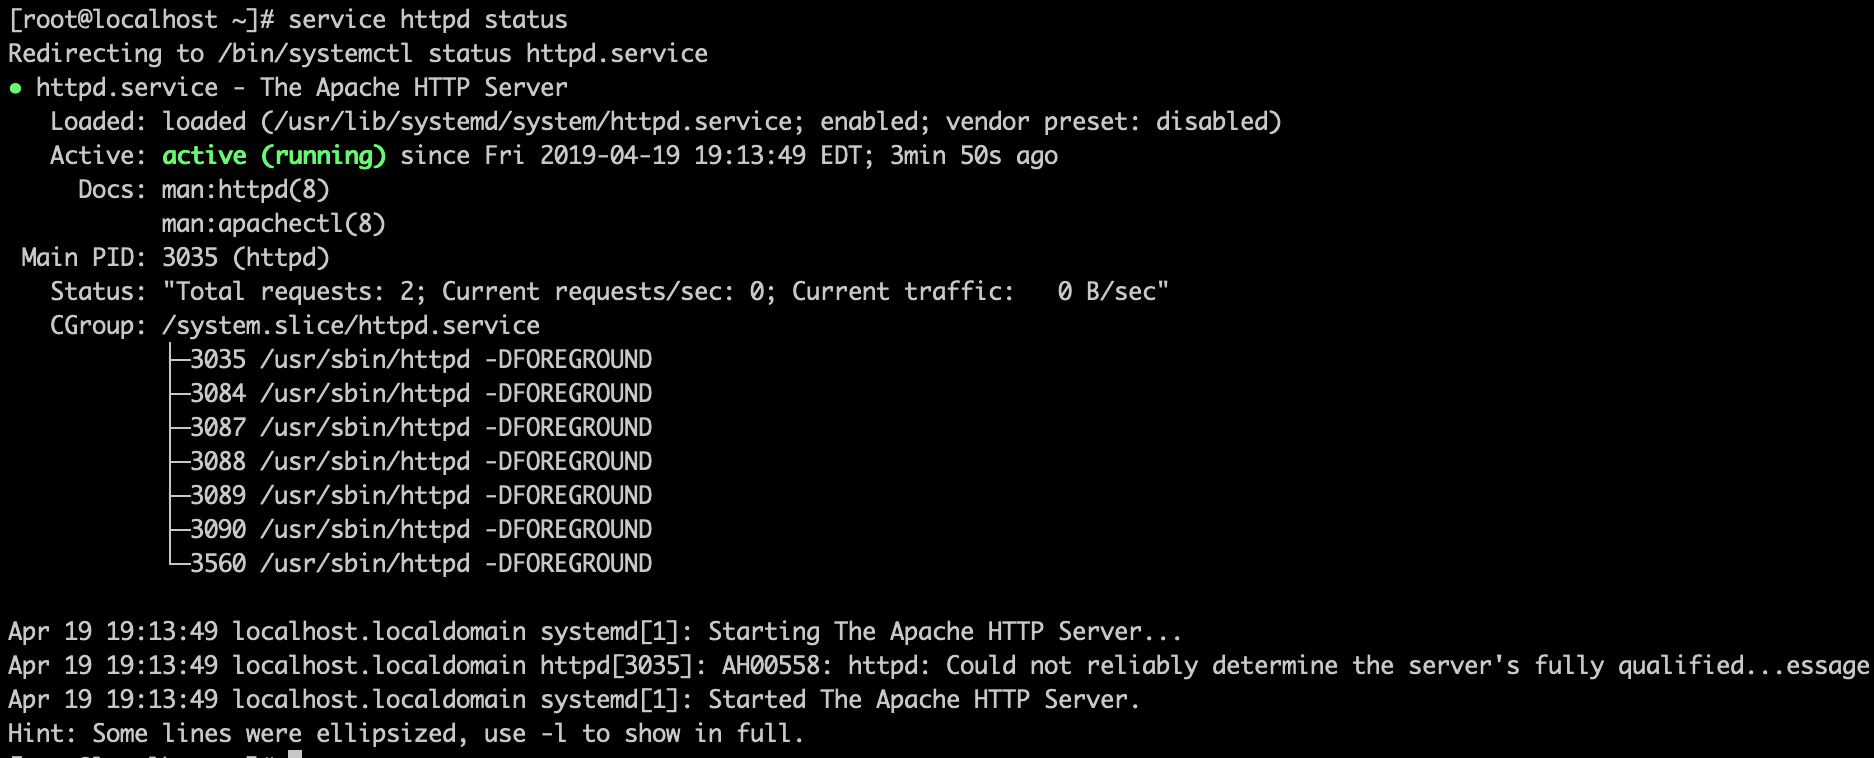
Apache Service 확인
# service httpd status
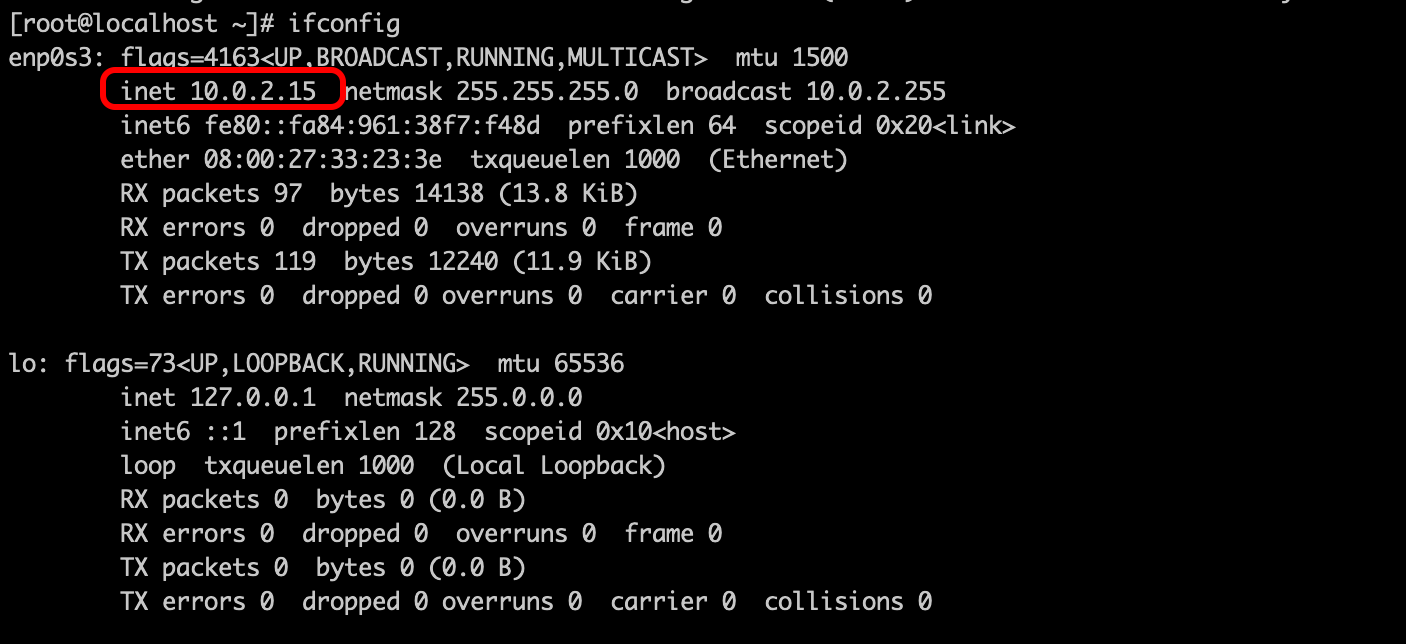
ip 확인하기
# yum -y install net-tools
# ifconfig
하지만 10.0.2.15 ip로 mac에서 접근하면 접근할수 없습니다.
외부접근을 위한 설정은 다음 포스팅을 확인해주세요.
반응형
'App & OS > Linux & MacOS' 카테고리의 다른 글
| [CentOS] Apache 환경설정하기 (0) | 2019.04.20 |
|---|---|
| [CentOS] Virtualbox 외부ip 설정하기 CentOS (0) | 2019.04.20 |
| [CentOS] OracleJDK 설치 (0) | 2019.04.20 |
| [CentOS] OpenJDK 설치 (0) | 2019.03.31 |
| [CentOS] ssh 설정하기 [OSX, VirtualBox] (0) | 2019.03.31 |
Comments


